
If the IRS rejects your ACA e-file or accepts it with errors, use the ACA Filing Error Corrections feature to identify the issues, update the affected employee records, and resubmit the corrected filing.
Uploading a Rejected or Accepted-with-Errors File
- Select File.
- Open ACA Details.
- Click Choose File and browse to the rejected or accepted-with-errors XML file on your computer.
- Select the XML file and click Upload XML File.
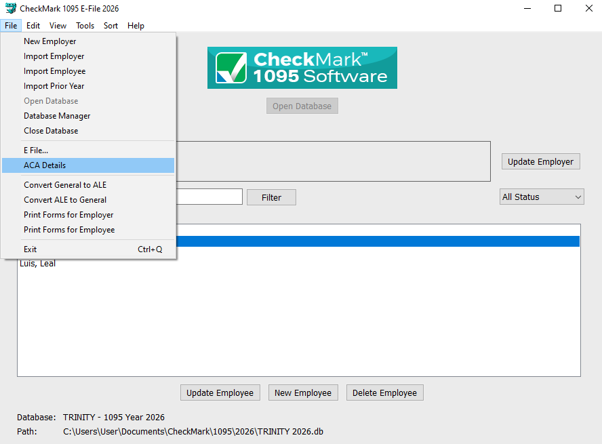
The application processes the uploaded file, automatically retrieves the Original Submission ID, and determines whether the filing was Rejected or Accepted with Errors.
Reviewing and Correcting Errors
After the XML file has been processed:
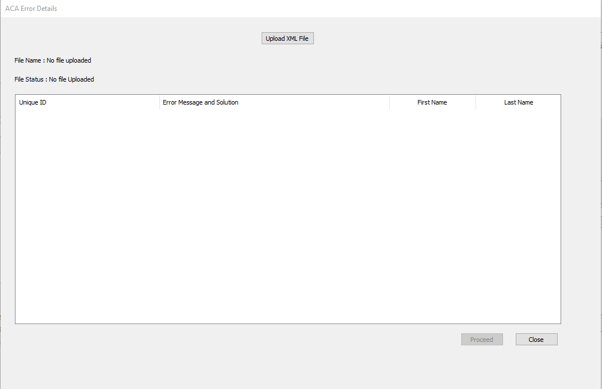
- The application automatically interprets supported IRS error codes (14 and 18), eliminating the need to look up their descriptions manually.
- A list of employees with filing errors is displayed.
- Each employee’s errors are described, along with the information that needs to be corrected.
- Update the required information directly on the screen and click Save.
Resubmitting the Corrected Filing
After correcting all validation errors:
- Navigate to File > ACA Details.
- Open the ACA Error Details screen.
- Select the corrected employee records for resubmission.
- Choose the appropriate Original Submission ID from the drop-down list.
- If you are correcting a filing that was accepted with errors and want to retain the original Receipt ID, select the Resubmit checkbox.
- The original Receipt ID is populated automatically.
- You can edit the Receipt ID manually if necessary.
- Click Create E-File to generate the corrected XML file.
The application preserves the required Submission ID and Receipt ID values during resubmission to help ensure that the corrected filing meets IRS resubmission requirements.