
E-Filing 1099 Forms
This article explains how to e-file 1099 forms through the IRS Information Returns Intake System (IRIS) Taxpayer Portal.
IMPORTANT – IRS FIRE System Retirement: The IRS has retired the Filing Information Returns Electronically (FIRE) System effective December 31, 2026. Beginning January 1, 2027, IRIS will be the only IRS electronic filing system for information returns, including current-year returns, prior-year returns, and corrections, including Forms 1099. The FIRE System is no longer available for filing information returns.
So, from tax year 2026 onwards, the taxpayer must use the Information Returns Intake System (IRIS) to replace the Filing Information Returns Electronically (FIRE) System.
If you are filing 1099 forms electronically for the first time, you must register with the IRS and obtain an IRIS Transmitter Control Code (TCC) before submitting your returns. To get started, visit the IRS IRIS website and complete the IRIS Application for TCC.
The IRS recommends allowing up to 45 days for TCC application processing. We recommend completing your registration well in advance of the filing deadline to avoid delays. For more information about IRIS registration and electronic filing requirements, visit the IRS Information Returns Intake System (IRIS) page.
Important: While CheckMark Inc. makes every effort to provide accurate and up-to-date tax information and forms, we cannot be held responsible for changes in IRS regulations, tax requirements, or errors in information returns filed with the IRS.
NOTE: E-filing is available only to customers who have purchased the 1099 E-File Version. To upgrade from the Printed Version to the E-File Version, contact our support team at support@checkmark.com.
Filing IRIS 1099 Forms
- Select File > IRIS from the menu.
- The Additional Payer’s Information screen opens.
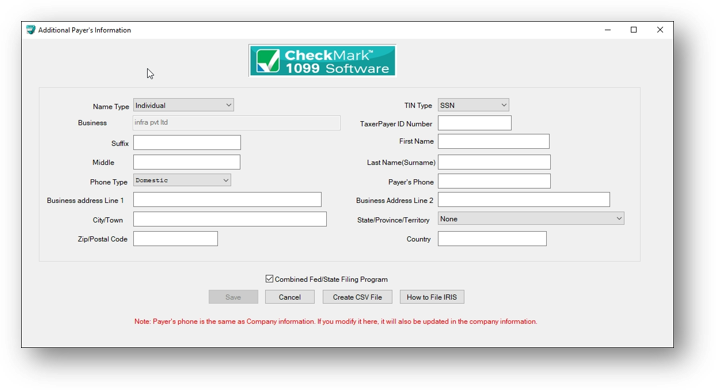
- Complete all the required fields on the Additional Payer’s Information screen.
- After entering all the required information, click Save. The Create CSV File button becomes enabled only after the information is saved.
- Click Create CSV File to generate the CSV file.
- If there are any errors in the transmitter information, a pop-up window appears displaying the errors that need to be corrected.
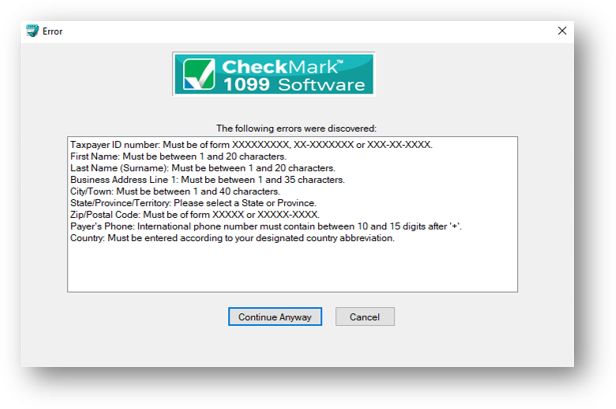
- Click Cancel to return to the Transmitter Information window and correct any setup errors. Alternatively, click Continue Anyway to proceed with saving the .txt file.
- The Save As dialog box opens.
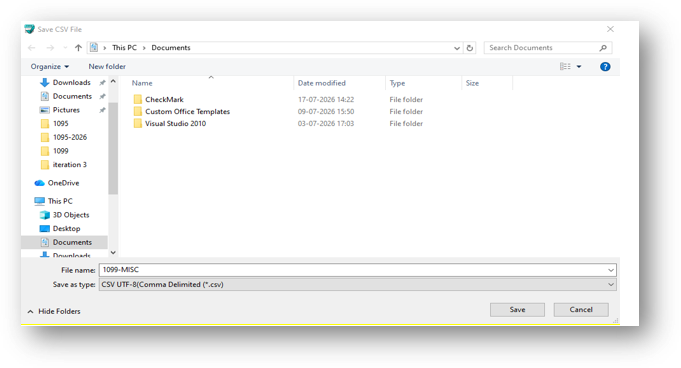
- Enter a file name, or use the default name if one is provided. Save the file to a location that is easy to find later. The Desktop is a convenient location. Click Save.
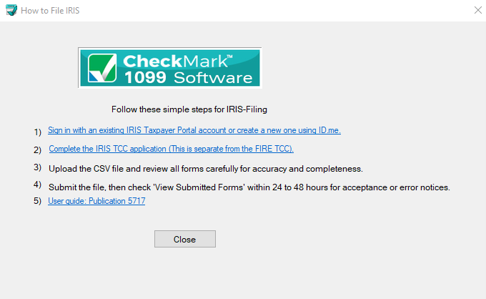
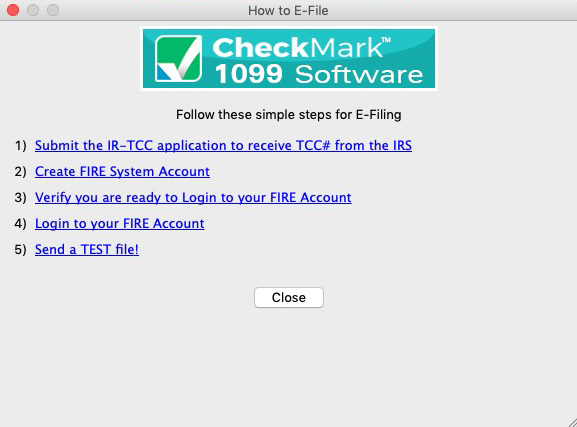
- Optional: If you need additional guidance on filing IRIS forms, click the How to File IRIS button. A pop-up window appears with step-by-step instructions and important links for IRIS filing.
Email For Recipients
Use the Email for Recipients option in the File menu to email the recipient’s PDF file. The email page opens with the attached 4-up PDF file, allowing you to review the attachment and make any necessary changes before sending the email.
Steps to Email Your PDF
- Open the File menu in the application.
- Click Email for Recipients.
- The email page opens with the attached 4-up PDF file. Review the attachment before proceeding.
- Make any necessary changes to the email content.
- Ensure that the correct email address is provided in the To field.
- Click Send to send the email.
Notes
- If an email address is provided in the recipient details, the application redirects you to the email page.
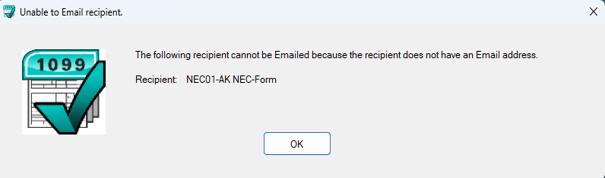
- If no email address is provided in the recipient details, the application does not redirect you to the email page, and the email cannot be sent through this workflow.
- If the customer’s email address is missing, a pop-up message appears displaying the recipient’s first and last name.
- Pop-up Message: The message displays the recipient’s first and last name.
==================================
Summary Report
The 1099 Summary Report summarizes vendor payments by 1099 type. These totals can be compared to Box 5 on Form 1096. Utilize this report to verify the accuracy of your values before printing.
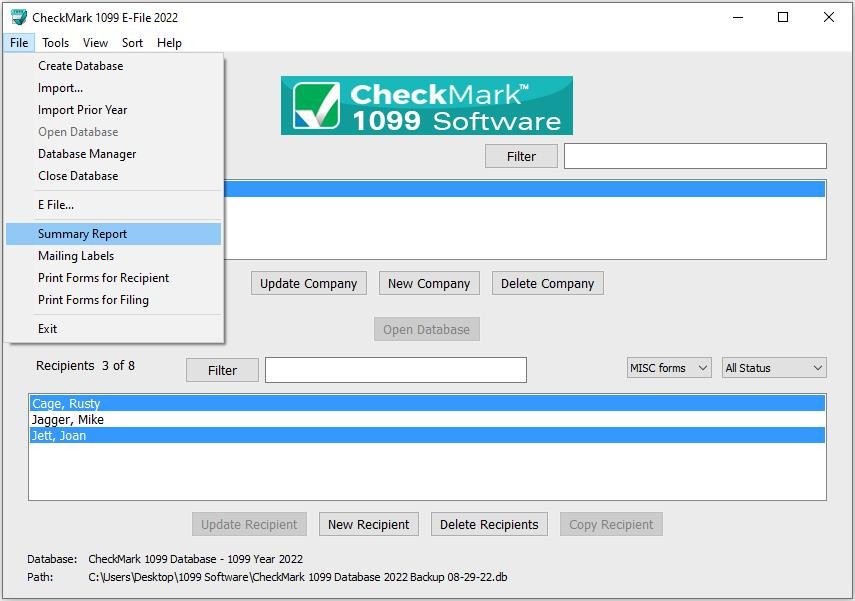
- Under File, select Summary Report. Click Print.
Creating a file to eFile
- Select the company you want to eFile for. You can select multiple companies if you wish. For information on selecting multiple companies, see Selecting Multiple Companies.
- Select the recipients you wish to include. You can sort using the different forms or choose All Forms from the drop down menu to select all recipients. For information on selecting multiple recipients, see Selecting Multiple Recipients.
Note: You must choose at least one company, but if you do not choose any recipients, all recipients will be included in the eFile.
You can sort the recipients by the Status drop down menu to group recipients as Printed, Completed, Validated, Corrected and Void. For more information on using the Status drop down menu and what Status means, see “Status” in Recipients Set Up.
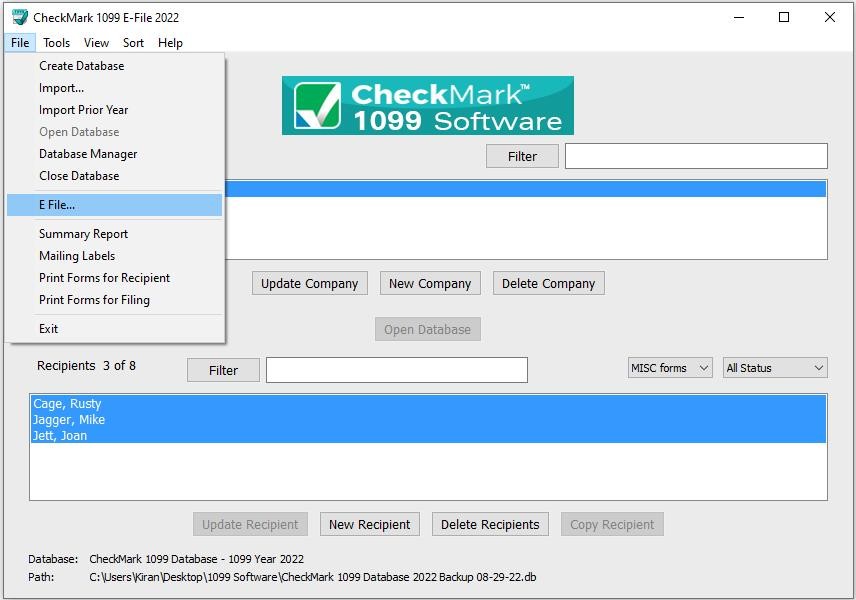
- From the File menu, choose eFile…
- In the pop-up window. Fill in all applicable fields.
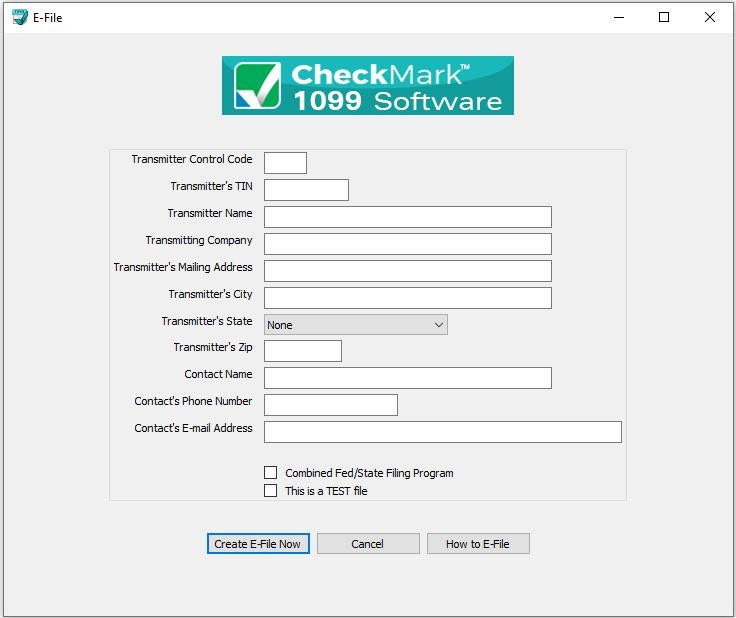
- Optional: If you need more information on how to set up an E-file account, Click the How to E-file button. A pop-up window with important links on how to first apply, create a FIRE system account.
- Once all the information is filled in, click the Create E-File Now button.
- If there are any errors in the transmitter information window, you will see a pop-up window explaining what errors occurred.
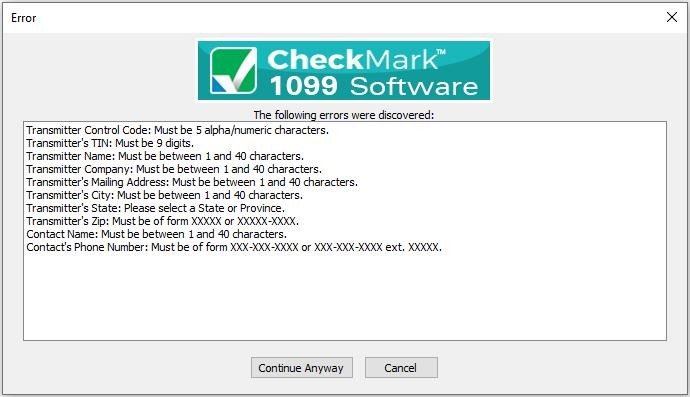
- Click Cancel to go back to the transmitter information window to correct any set up errors. Or click Continue Anyway to proceed with saving the .txt file.
- A Save as dialog box opens.
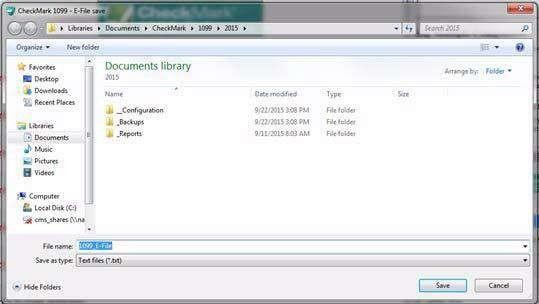
- Enter a name for the file or use the default name if one is given. Save the file to a location that is easy to find. The Desktop is an easy location to save the file to and find it there later when you are ready to submit the file to the IRS FIRE system. Click Save.