Formatting Checks, W-2s, and W-3s
You can reposition items that print on checks, or pre-printed W2s, and W-3s to align printing for your particular printer or form.
- Click the Edit Check Format button on the appropriate window.
Note: To format employee paychecks and employer payment checks, use the Print Paychecks window. To format W-2s and W-3s, use the W-2 &W-3 Statements window. A format window appears that allows you to reposition the fields.
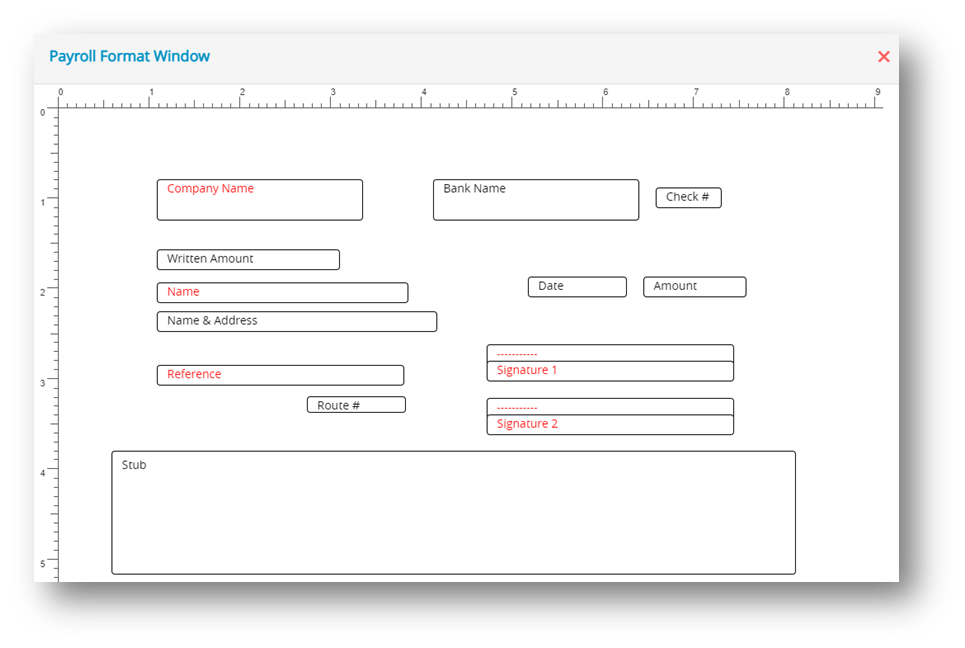
For example: Click the Edit Check Format button associated with the Custom Check Format area on the Print Paychecks window, the following window appears:
Use this Format window to position the fields that print on checks. Employer checks use the field positions set up for employee paychecks. - Drag the print fields to their new positions.
Note: Click and hold the mouse button on the desired field and then drag the mouse to the new position to relocate it. To prevent a field from being printed, perform a double-click action on the field, which will result in the field’s name turning red. If you wish to re-enable the field for printing, simply double-click on the field again, and its name will return to black. - When you’ve finished repositioning the print fields, close the window.
Step result: A pop-up appears.
- Click Yes to save the format changes.
Resetting the Default
You can reset the default format placement for checks and W-2/W-3 reports.
Checks: To reset the default check format, open the Print Paychecks window. Click either the Custom-Check in Middle or Custom Check on Top option. Hold down the Shift key on the keyboard and click the Edit Check Format.

