This article explains how to record the hours worked by employees in different categories, such as regular hours, overtime, sick leave, and vacation time. It also shows how you can make this process easier by importing data from an external program using a tab-delimited text file.
Note: If you open this window and cannot see your employee list or header columns, it means that you have not configured Hour Categories for your company. Before proceeding, you need to set up Hour Categories first. For more information about Hours Category, see “Setting up Hour Categories“.
Moving Around the Hour Fields
You can use your mouse to highlight any field by simply clicking the field, or you can press the following keys on your keyboard:
| Keystroke | Result |
| Tab | Next hour field to the right or to select options. |
| Alt + Up or Down Arrow | To see field list. |
| Down Arrow | To select field. |
| Tab + Enter | To save or record the entry hours. |
Entering Hours for an Employee
- Click Run Payroll drop-down option from the menu and then select Enter Hours.
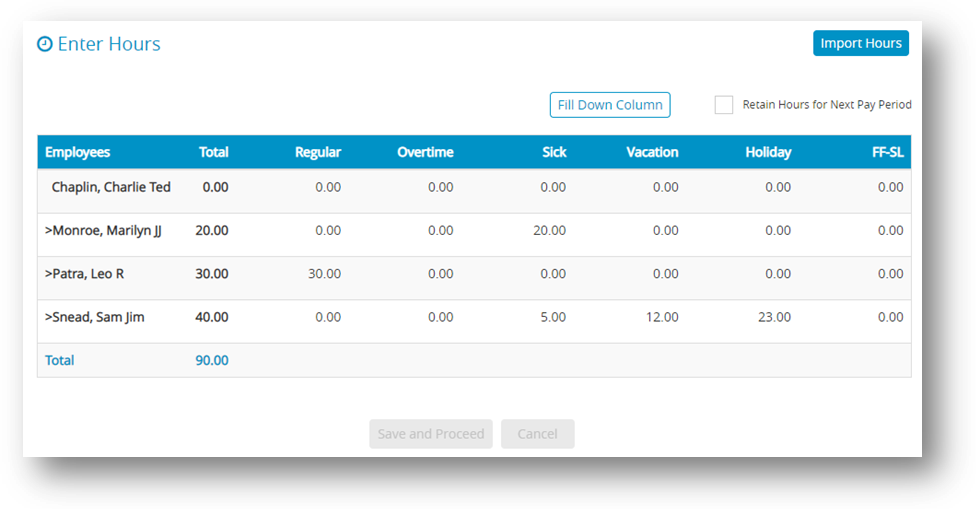
The total column shows how many hours each employee worked and the total number of hours worked for a specific period. - Select an hour category for an employee.
Note: Hourly employees are indicated by a greater than symbol (>). The hour categories that were set up with the Hour Categories window appear across the top of the hour fields. These categories appear in the order that you set them up in the Hour Categories window. - Enter the number of hours for the category.
Note: Numbers to the right of the decimal point are treated as hundredths of an hour. For example, enter “30.75” for an employee who worked thirty hours and forty-five minutes. - Continue entering employee hours.
- Click Save and Proceed or press ENTER key after entering the employee hours for the pay period. After the hours are saved, they can be used for pay calculations on the Calculate Pay window.
Step result: After pressing the enter key or click the “Save and Proceed” button, the system will automatically direct you to the “Calculate Pay” window.
Options on Enter Hours Window
✔ Fill Down Column
You can quickly enter the same number of hours, such as eight hours of holiday pay, for each employee. The following steps are for examples
- Select the first hour field under Holiday.
- Enter 8 hours and then click Fill Down Column button. A message appears asking if you want to replace values for all cells.
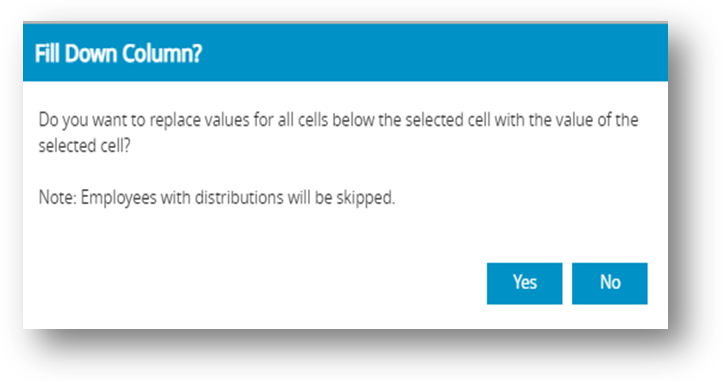
- Click Yes.
Step result: Starting with the currently selected employee, each value in the column is replaced with“8”.
Note: If the selected employee already has an hour distribution. CheckMark Online Payroll is unable to modify hour information for an employee with an hour distribution. The following alert appears.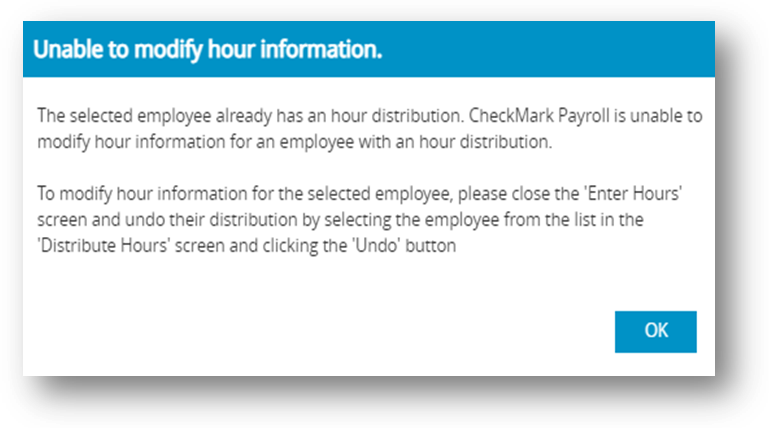
✔ Retain Hours for Next Pay Period
If you want the same number of hours for each employee to automatically appear for the next pay period, check the Retain Hours for Next Pay Period option.
Important: If you’ve changed any hours for an employee whose calculated pay has already been saved, CheckMark Online Payroll will automatically undo the saved calculation. You must recalculate the employee’s pay with the new hours on the Calculate Pay window.
✔ Import Hours
CheckMark Online Payroll can import hours from a spreadsheet or program, as long as the hours have been saved in a tab-delimited text file format. The hours you import should be total hours for the pay period. The order of the hours in the text file must match the order in which they appear on the Enter Hours window. If an employee does not have any hours for a particular hour category, you still need to separate the categories by a tab or enter a zero (0). The text file must have a TAB between each field and a RETURN at the end of each employee record. Hours can have up to two places to the right and three places to the left of the decimal point (000.00).
Important: You cannot import hours directly to Jobs or Departments, but you can allocate the pay to the appropriate Jobs or Departments after you have created a paycheck. For more information, see “Allocating Wages After Paychecks are Created“.
You can choose to import hours by the following match.
Employee Name – Employees in your text file are saved in alphabetical order with the last name, first name and then employee hours for each hour category.
Social Security # – Employees in your text file are saved by Social Security Number followed by hours for each hour category.
Employee Name and Social Security # – Employees in your text file are saved in alphabetical order with last name, first name, Social Security Number followed by the hours for each hour category.
To import employee hours into CheckMark Online Payroll
- Click Run Payroll drop-down option from the menu and then select Enter Hours.
- Click Import Hours and then select the appropriate Import Hours using the following match option.
You can choose Employee Name, Social Security #, or Employee Name And Social Security #. - Click Choose File, select the text file to import and then click Open.
Step result: The text file should be loaded.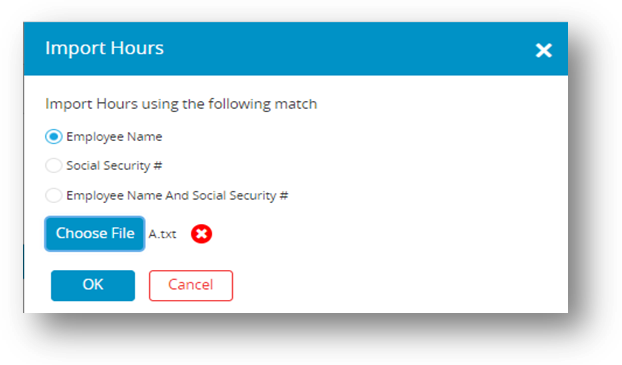
- Click OK.
Note: If an employee’s information appears in the text file, but is not found in CheckMark Online Payroll, a message appears telling you that the employee could not be found. Click Yes to continue importing or click No to stop the import process. - After importing is completed click Save and Proceed.
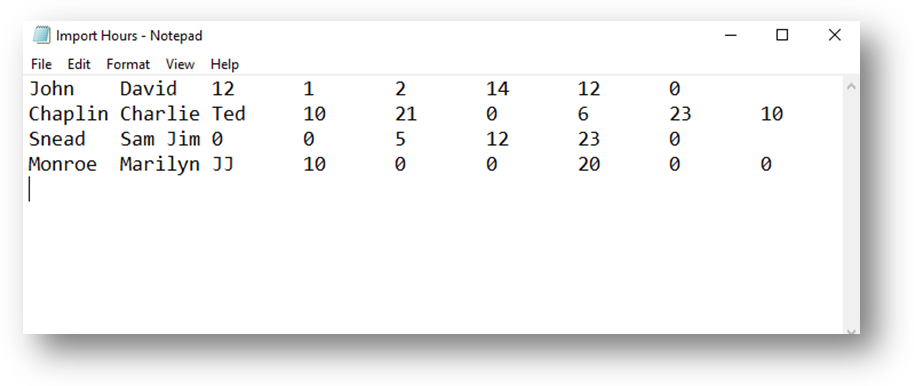
Here is an example of an acceptable text file format, if the Employee Name option is selected:
John[TAB]David[TAB]12[TAB]1[TAB]5.45[ENTER]
Chaplin[TAB]Charlie[Space]Ted[TAB]30[TAB]3[TAB]4[ENTER]