
Database Manager
CheckMark 1099 stores company data in a database. When initially opening CheckMark 1099, a database named CheckMark_1099_ Database_[year] is created.
If you complete 1099 forms for only one company, this is probably the only database you will need.
However, if you process forms for more than one company, you will need to choose one of the following options to manage your companies correctly. You can either store all of your company files in the same database, or you can create separate databases and store individual companies in them.
Storing Multiple Company Files in the Same Database
Each database can contain multiple companies. The advantage of storing all of your different company files in one database is that when you Backup Database, Restore DataBase, Close Database, or advance to a new year, all companies stored in that database will be backed up, restored, closed or advanced to a new year at the same time, saving you time.
Storing Company Files in Separate Databases
The advantage of storing each of your company files in separate databases is that you have more control over where your database is stored on your computer, as well as when you want to Backup Database, Restore Database, Close Database, or advance companies to a New Year.
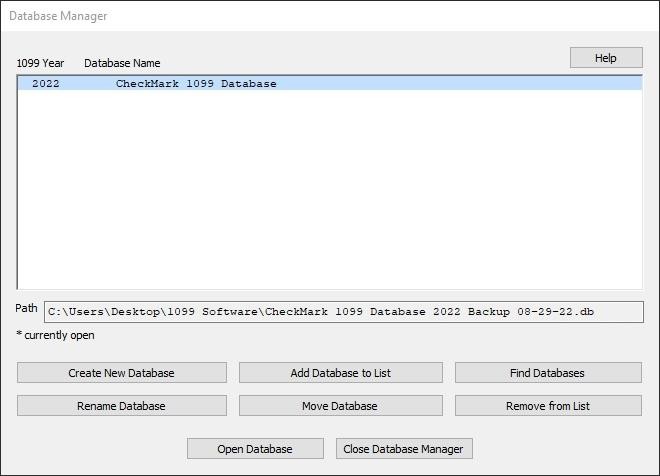
Using the Database Manager
Choose Database Manager from the File menu.
Create New Database
This option allows you to create and save a new database in any location you wish. Keep in mind that each database can store multiple companies.
- Click Create New Database.
- Enter a Database Name and Payroll Year. Click the Browse button to select a new location to save the database.
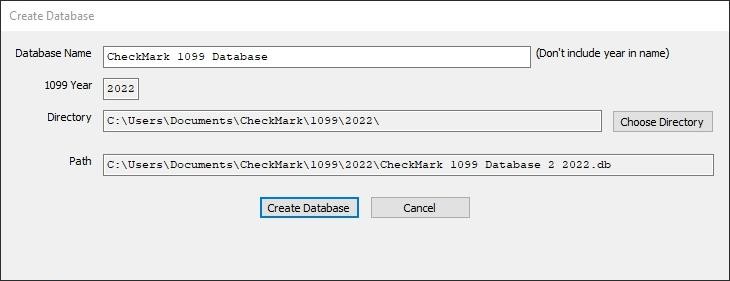
- Click Create Database to save the new database.
Add Database to List
This button allows you to add an already-existing database to the list. For example, if you copied a database from another computer and the Database Manager does not list this database, you can choose Add Database to List and browse to that location to update the Database Manager’s list.
- Click Add Database.
An Open dialog box appears
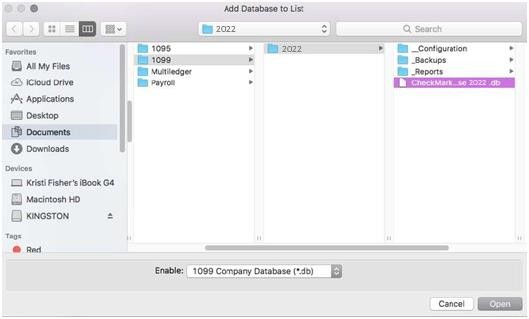
- Browse to the location where the database is saved.
- Select the database and click Open.
The database is added to the list in the Database Manager.
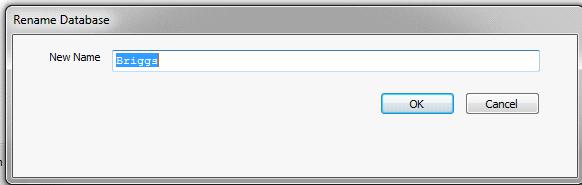
Rename Database
This option allows you to rename the database. It is recommended that you use only alpha-numeric characters.
- Click Rename Database. The following alert appears:
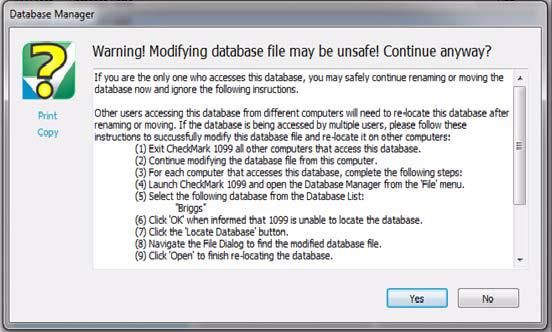
- Click Yes. Otherwise, if you don’t want to rename at this time, click no
- Enter the new name and click Rename Database to save.
The Rename Database window appears:
Remove From List
This option allows you to remove a database from the list.
Note: This only removes the listing in the Database Manager. It does not delete the database file from the saved location. To delete a database, you will need to manually delete the database (.db) file from your hard drive or saved location.
- Click Remove From List.
A Warning message appears
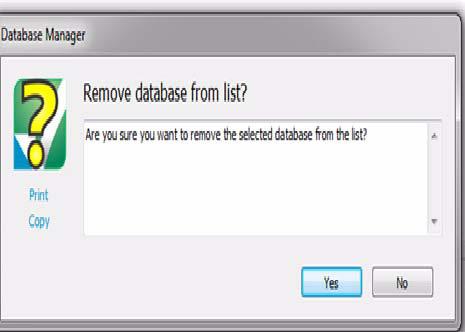
- Click Yes to remove the database from the Database Manager list.
You can add the database again at anytime by using the Add Database command as long as you don’t delete the database from the computer.
Open Database
This option allows you to choose a different database and open it up to view all saved companies in that particular database.
- Select the database you want to open and click Open Database.
The new database is now open and all companies stored in this database are now available.
Close Database Manager
This option closes the Database Manager window.
Update Company
This commands allows you to update the currently selected company’s information. Once the program is launched, open the database that contains the company you want to update. Highlight the company and click the Update Company command. Enter the information you want to change, then click Update Company to save the changes.
New Company
This Command allows you to add a new company to the database that is currently open. Once the program is launched open the database you wish save the company in. Click New Company then enter the information for this company. Click Add Company to save the company to the database.
Delete Company
This command allows you to delete a company from a currently opened database. Once the program is launched open the database that contains the company you want to remove. Click Delete Company and a screen will appear to make sure you want to delete the company. Click Confirm Delete to complete the deletion process.
Exiting CheckMark 1099
To exit or quit CheckMark 1099:
- Choose Exit from the File menu (Windows)
- Choose Quit from the CheckMark 1099 menu (Mac)