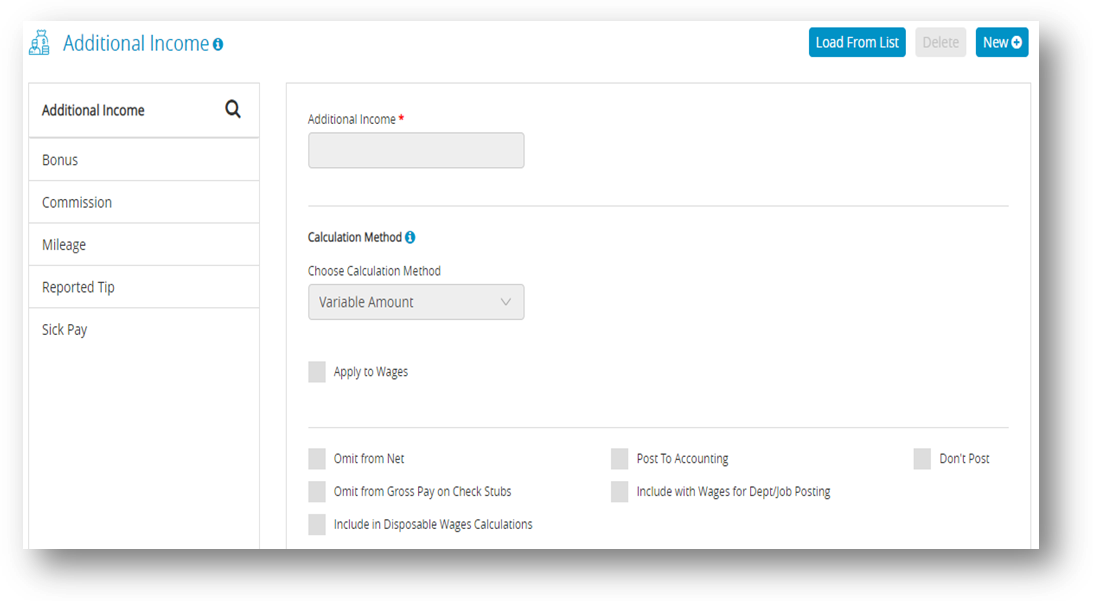
In CheckMark Online Payroll, the Additional Income feature enables you to establish various types of supplementary earnings, such as mileage, bonus or advance that your organization utilizes to compute an employee’s compensation beyond their regular salary or hourly wage. You can either create your own additional income categories or choose from pre-existing ones and customize them as required.
Note: You can add up to 40 Additional Income categories for your company and assign up to 8 per employee.
Important: Do not delete Additional Income categories after creating the first check of the year. Categories should only be deleted after the New Year file has been created, but before any checks have been made.
Important: Avoid changing the tax status of Additional Income categories after the first check of the year is created. Instead, stop the category by setting the amount/rate to zero and create a new category with the desired tax setup.
Adding Pre-Defined Additional Income Categories to Your Company
Important: Pre-defined incomes are configured using general tax guidelines. Verify the tax setup with current tax laws including your state and/or locality. You can modify any pre-defined income.
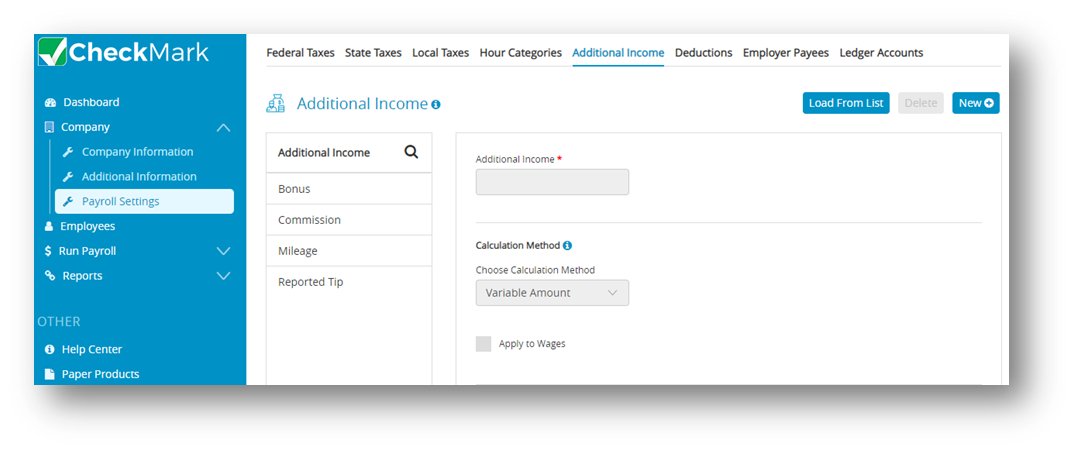
- Click Company, select Payroll Settings and then select Additional Income.

- Click Load From List and then select one or more Additional Income categories from the list.
Note: To select more than one hour categories, drag through the list and to select non-consecutive categories, hold down the CTRL key for Windows or Command key for Macintosh and click the desired names. - Click Ok.
Step result: Categories will be loaded in the list.
Creating a New Additional Income Category
If you need an Additional Income category that’s not predefined, use the “New” button to create a new one.
Note: When adding a new income (not applicable for Variable calculation) or modifying a rate or amount, you will be prompted to “Change Amount/Rate for all employees assigned this income category?” when you click Save. If this is a new income category setup, selecting either Yes or No will have no effect. If you modify an existing income category:
✔ Clicking Yes overrides any specific amount entered on the Employees window to the amount/rate entered and saved on the additional Income window.
✔ Clicking No leaves the specific amount entered on the Employees window.
- Click Company, select Payroll Settings and then select Additional Income.
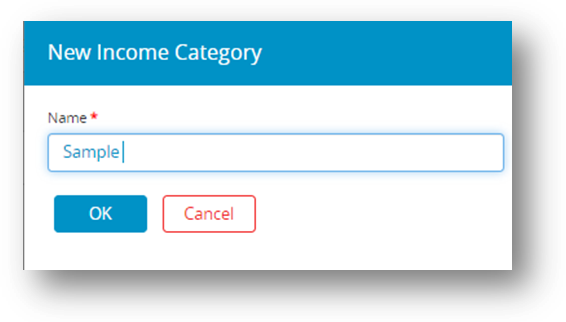
- Click New and then enter a name for new income category.
Note: The name for the new Income category can be up to 12 characters.
- Click OK.
Step result: The new additional income should be added to the list of Additional Income. - Select the new additional income from the Additional Income list.
- Select the calculation method dropdown and then select method.
- Define the Additional Income parameters.
- Click Save.
Tip: If the rate/amount of the Additional Income is the same for ALL employees – enter the rate/amount in the edit box on this window. Then, that amount will be entered on the Calculate Pay window for all employees you assign the Additional Income to on the Employees window.
If the rate/amount of the Additional Income is different for each employee – enter zeroes on this window. Then, modify the rate/amount on the Employee window when you assign the income to the employee.
Modifying an Additional Income Category
Important: Do not change the tax status on any Additional Income category once the first check of the year has been created. To make a change to the tax set up mid-year, stop the category from being applied by simply modifying the amount/rate to zero. Then create a new category with the correct tax set up to be applied.
- Click Company, select Payroll Settings and then select Additional Income.
- Select the category from the Additional Income list.
- Make the necessary changes to the category’s definition.
- Click Save.
Important: Once the first check of the year has been created, do not change the tax status on any Additional Income category. Instead, stop the category by setting the amount/rate to zero and create a new category with the correct tax setup to be applied.
Example 1: You update the amount of mileage reimbursement from .0655 cents/mile to .565 cents/mile in the Additional Income window and click Save. When prompted to Change Amount/Rate, clicking Yes will update all employees that have the mileage category assigned and update those values regardless of what value was entered previously.
Example 2: You set up a category for commissions based on percent of sales. Each employee this applies to might have their own specific amount. When saving this category, selecting No upon this Change Amount/Rate screen, all values entered in the Employee Set Up screen under the Income tab will remain and each person will continue to have specific amounts.
Note: If no employees have this category assigned to them in the Employee Set Up window, selecting Yes or No will have no effect.
Deleting an Additional Income Category
You can delete an Additional Income category as long as there aren’t any employee checks or year-to-date balances associated with it and it is not assigned to any employees.
Important: Do not delete any Additional Income categories once the first check for the year has been created. The only time a category should be deleted is after the New Year file has been created, but before any checks have been created.
- Click Company, select Payroll Settings and then select Additional Income.
- Select the category from Additional Income list.
- Click Delete.
Step result: A pop up appears asking you to verify that you want to delete. - Click Yes.
Items in the Additional Income window
| Options | Description |
| Variable Amount | Amount paid to an employee varies with each pay period. If this option is selected, the amount that appears on the Calculate Pay window will always be 0.00 until you override and enter the amount of the additional income. |
| Fixed Amount
|
✔ Select Fixed Amount per Pay Period, if the amount paid to an employee is the same each pay period.
✔ Select Fixed Amount per Hour Worked, if the amount paid to an employee is multiplied by the number of hours worked that pay period. ✔ Select Fixed Amount per 1st Chk of Month, if the amount paid to an employee is the same each month. The amount will be added to the first paycheck created for the month. ✔ Select Fixed Amount per 1st Chk of Quarter, if the amount paid to an employee is the same each quarter. The amount will be added to the first paycheck created for the quarter. |
| Fixed % of Sales | Select this option if the Additional Income should be calculated as a fixed percentage of an employee’s total sales, such as a commission. The value entered here should be a percent, not a decimal value.
Note: Select Apply to Wage check box if the Additional Income should be calculated as a fixed percentage of an employee’s total wages. The value entered here should be a percent, not a decimal value. For example a decimal value of .015 should be entered as 1.5. Important: There are two ways to handle a Fixed % of Sales or Fixed % of Wages income category: ✔ If the Fixed % is the same for all employees, you can enter the rate/amount in the edit box on this window. This is for all the employees who are set up to receive this Additional Income. ✔ If the Fixed % is the different for each employee, you can modify the amount for each employee on the Income tab of the Employee Setup window. |
| Mileage Amount per Mile | Select Mileage Amount per Mile, if the Additional Income should be calculated on the number of miles an employee drives.
Once you’ve assigned the category to an employee, you can enter the number of miles on the Calculate Pay window. |
| Piecework Rate | Select Piecework Rate if the Additional Income should be calculated on a rate an employee receives for a quantity you enter.
Once you’ve assigned the category to an employee, you will enter the number of pieces on the Calculate Pay window. |
Other Options in the Additional Income window
| Omit from Net | Check this option if the income category should only be added to an employee’s wages for taxing purposes but not included in the net of the employee’s check. An example where this would be used is Reported Tips. Incomes with this selected will not post into your accounting program. |
| Include with Wages for Dept/Job Posting | Check this option if the income category amount should be included in the Department or Job wage distribution when posting to your accounting program |
Tip Income Options
You can check either Allocated Tip or Reported Tip but not both.
| Important | When either Reported Tip or Allocated Tip is checked (You can check either Allocated Tip or Reported Tip but not both), other checkboxes, such as Tax Status options, are automatically set. However, you should verify these settings according to current tax laws. |
| Allocated Tip | The Allocated Tip amount should not be included in the employee’s net pay or be subject to any employee withholding taxes, and it will be reported separately in the Allocated Tips box on the employee’s W-2 at the end of the year. |
| Reported Tip | Check Reported Tip if the income should not be included in net pay, but it is subject to Social Security and Medicare, federal, state, and local withholding taxes. Reported tips are also subject to employer taxes. |
Exempt From
By checking the appropriate options, you can classify an Additional Income category as exempt from any combination of the following taxes.
| Options | Description |
| Federal Tax | Check Federal Tax if the income should be exempt from Federal Withholding tax. |
| Social Security | Check Social Security if the income should be exempt from Social Security Withholding. |
| Medicare | Check Medicare if the income should be exempt from Medicare Withholding. |
| FUTA | Check FUTA if the income should be exempt from Federal Unemployment tax. |
| State Tax | Check State Tax if the income should be exempt from State Withholding tax. |
| SUTA | Check SUTA if the income should be exempt from State Unemployment tax. |
| Local Tax | Check Local Tax if the income should be exempt from Local Withholding tax. |
| Deduction (%) | Check Deduction (%) if the income should not have a Fixed % Deduction item applied to it. For example, you may not want to take a 401(k) deduction out of a bonus.
Step 1—Set up the Additional Income Item
Step 2—Set up the Deduction Item
|
W-2 Options
| Options | Description |
| Box 10- Dependent Care Benefits | Check this option if you want the additional Income amount to print in Care Benefits Box 10, Dependent Care Benefits, on the W-2. |
| Box 11- Nonqualified Plan | Check this option if you want the Additional Income amount to print in Box 11, Non-Qualified Deferred Compensation, on the W-2. |
| Box 12 | Check this option if you want the Additional Income’s code and amount to print in Box 12 of the W-2 Statement. A Code must also be entered when this is selected. Refer to the Instructions for Form W-2 from the IRS for the code to be entered here. Codes are entered as capital letters. |
| Box 12- Code | Enter the one-letter code using a capital letter. Refer to the “Instructions for Form W-2” section of the IRS publication Federal Employment Tax Forms for guidelines about what codes to use for Box 12. |
| Sec. 457 | Check this option if you have selected Box 11 and the non-qualified deferred compensation is a section 457(b) plan. |
| Box 14 Other | Check this option if you want the Additional Income category’s amount and description to be included in Box 14 on the W-2 form. |

