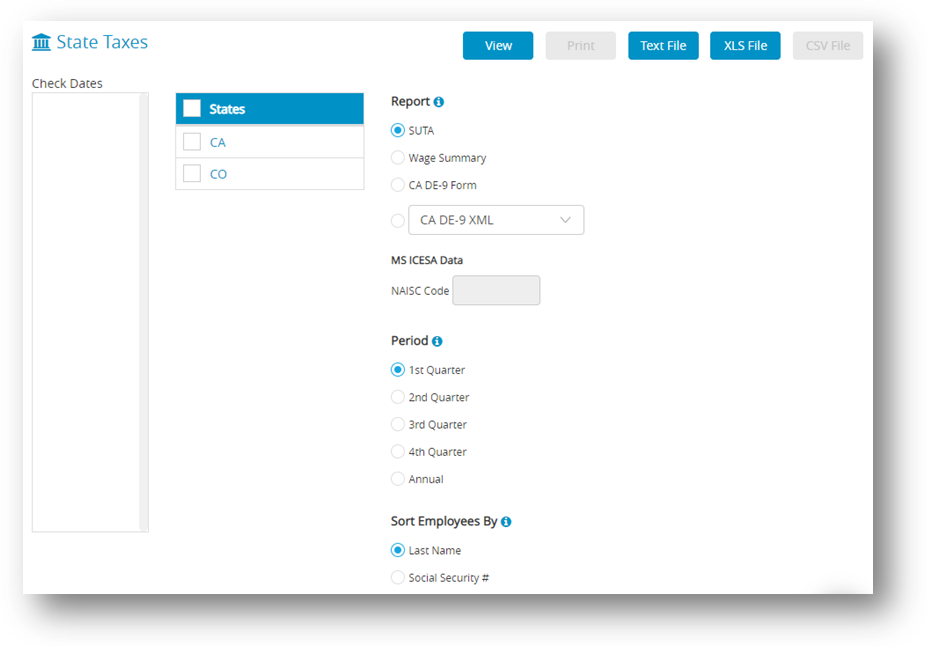
The State Taxes window allows you to produce a SUTA report, wage summary, California DE-6 Form and the MMREF file for NY and CA DE-6.
Creating SUTA Taxes Reports
The SUTA report shows wages exempt from SUTA (state unemployment), wages subject to SUTA, wages in excess of the SUTA maximum, and SUTA taxable wages. It also shows your SUTA rate, SUTA tax amount, number of employees per month and number of employees in the pay period including the 12th of the month for each month of the quarter.
- Click Reports drop-down option from the menu and then click Payroll.
- Click State Taxes.
- Select one or more states for the SUTA report.
Note: You can select a consecutive or non-consecutive series of states from the list.
If no states are highlighted, all states will be reported. - Make sure that the SUTA radio button is selected.
- Select the quarter for which you are reporting, or select Annual.
- Select the Sort Employees by option.
Note: If Last Name is selected, the report will be organized by employees’ last name.
If Social Security # is selected, the report will be organized by employees’ Social Security Number. - Click View, Text File, or XLS File.
Note: You can omit social security number for employees on all reports by selecting Omit SS#. For information see “Setting up Direct Deposit“.
Creating State Withholding Reports
The Wage Summary report shows the employee’s Social Security number, employee name, total wages, wages subject to state withholding, and state withholding by employee for the selected quarter, with a subtotal after each state.
- Click Reports drop-down option from the menu and then click Payroll.
- Click State Taxes.
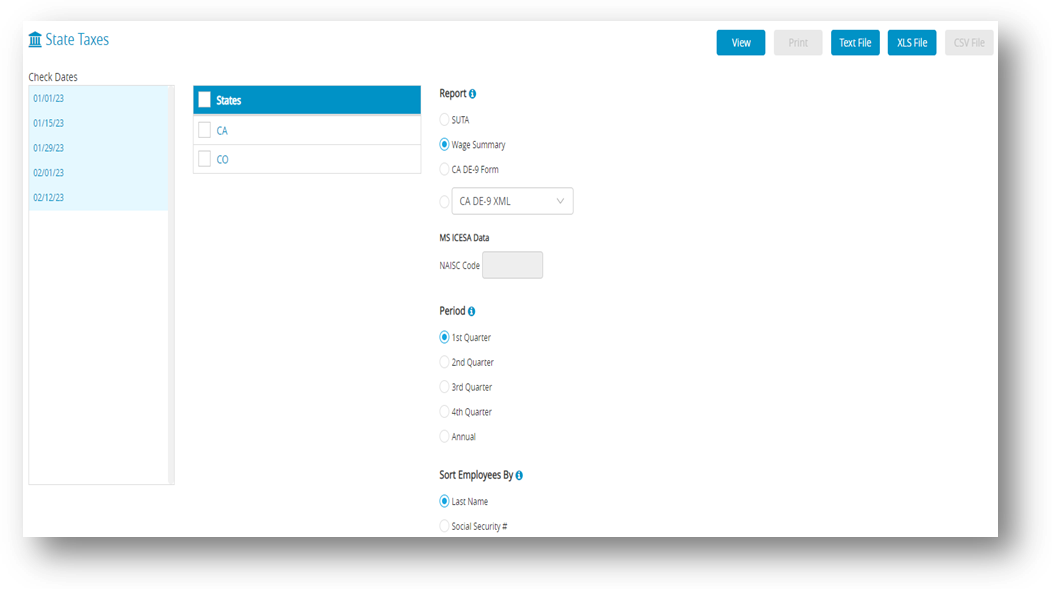
- Select one or more states for the Wage Summary report.
Note: You can select a consecutive or non-consecutive series of states from the list.
If no states are highlighted, all states will be reported. - Select the Wage Summary radio button.
- Select the quarter for which you are reporting, or select Annual.
Note: A list of check dates appears for the selected quarter. Check dates in the quarter are selected by default. If wage reporting for less than the full quarter is required, select the desired range of check dates. - Select the Sort Employees By option.
Note: If Last Name is selected, the report will be organized by employees’ last name.
If Social Security # is selected, the report will be organized by employees’ Social Security Number. - Click View, Text File, or XLS File.
Note: You can omit social security number for employees on all reports by selecting Omit SS#.
Creating California DE-9 Form for Printing
You can print a DE 9 form with the EDD directly from CheckMark Online Payroll. To print the DE-9 Form, do the following:
- Click Reports drop-down option from the menu and then click Payroll.
- Click State Taxes.
- Select the CA DE-9 Form option and select the desired Period option.
- Select CA in the States list.
- Click Print.
Step result: A pop up window appears: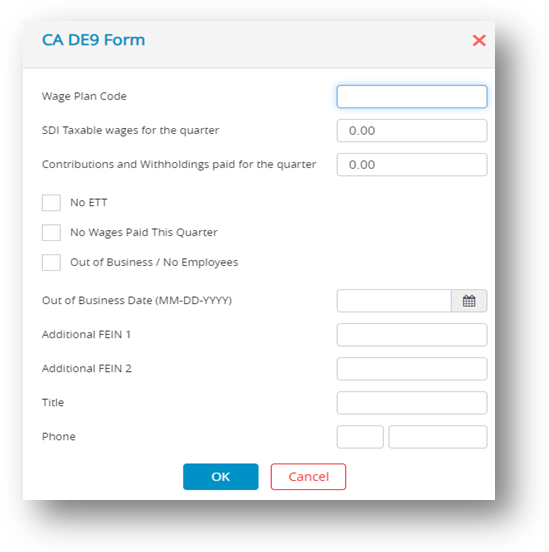
- Fill all the appropriate fields.
- Click OK.
Note: Even if the Preference to Omit SS# on Reports is selected under the File menu, the Social Security number for each employee will still appear when printing this report.
Creating California DE-9 XML File
Employer’s who are set up with California’s EDD to file their Quarterly Wage and Withholding Reports electronically, can save a file from CheckMark Online Payroll to submit to the EDD in the DE-9 XML format. For more information on submitting the DE-9 XML information electronically, contact the EDD. To save the report as an XML file, do the following:
- Click Reports drop-down option from the menu and then click Payroll.
- Click State Taxes.
- Select CA in the States list.
- Select the CA DE-9 XML option and the desired Period.
- Click Text File.
Step result: The following dialog appears: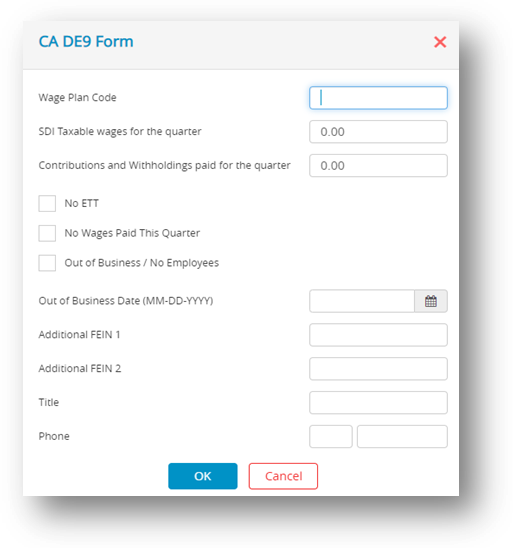
- Fill all the appropriate fields.
- Click OK.
Step result: A file should be downloaded.
Creating California DE-9C XML File
To save the report as an XML file, do the following:
- Click Reports drop-down option from the menu and then click Payroll.
- Click State Taxes.
- Select CA in the States list.
- Select the CA DE-9C XML option and the desired Period.
- Click Text File.
Step result: The following dialog appears: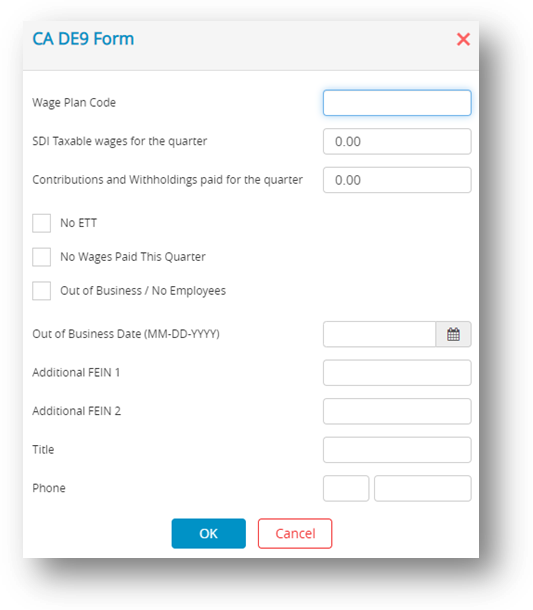
- Fill in all appropriate fields and click OK.
Step result: A file should be downloaded.
Creating CA DE-9C XML File
- Click Reports drop-down option from the menu and then click Payroll.
- Click State Taxes.
- Select CA DE-9C XML option in the dropdown under the Report section.
- Select CA in the States list and choose Quarter you want to save from the Period section (annual option not available).
- Click Text File.
- A dialog box should appear, fill in all appropriate fields and click OK.
Step result: A XML file should be downloaded automatically.
Creating CA DE-9C CSV File
- Click Reports drop-down option from the menu and then click Payroll.
- Click State Taxes.
- Select CA DE-9C CSV option in the dropdown under the Report section.
- Select CA in the States list and choose Quarter you want to save from the Period section (annual option not available).
- Click CSV File.
Step result: The following dialog box should appear.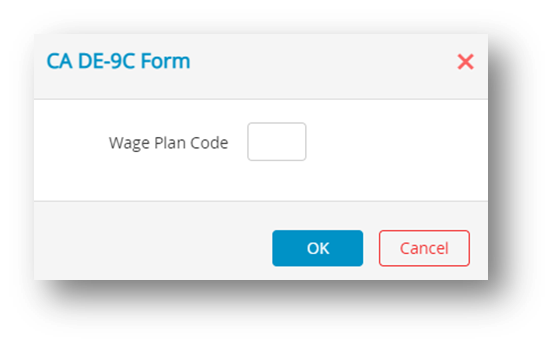
- Enter Wage Plan code and click OK.
Step result: A XML file should be downloaded automatically.
Creating NY MMREF File
- Click Reports drop-down option from the menu and then click Payroll.
- Click State Taxes.
- Select NY MMREF option in the drop down menu under the Report section.
- Select NY in the States list and choose Quarter you want to save from the Period section (annual option not available).
- Click Text File.
Note: A txt file should be downloaded and displayed automatically. The file is named MMREF by default.
Creating Mississippi ICESA File
- Click Reports drop-down option from the menu and then click Payroll.
- Click State Taxes.
- Select MS ICESA option in the dropdown menu under the Report section. If required enter the NAISC code.
- Select MS in the States list and choose what Quarter you want to save from the Period section (annual option not available).
- Click Text File.
Note: A txt file should be downloaded and displayed automatically. The file is named UIWAGE by default.

