In CheckMark Payroll version 8.2 and higher, a database is used to store all company and employee information. Multiple companies can be stored in one database or multiple databases can be created for each company. This section describes how to convert old company files in CheckMark Payroll Company Conversion Wizard if you’re opening data from Payroll versions prior to 8.2.
- Make sure all old Payroll files are closed. Launch the Payroll Company Conversion Wizard application.
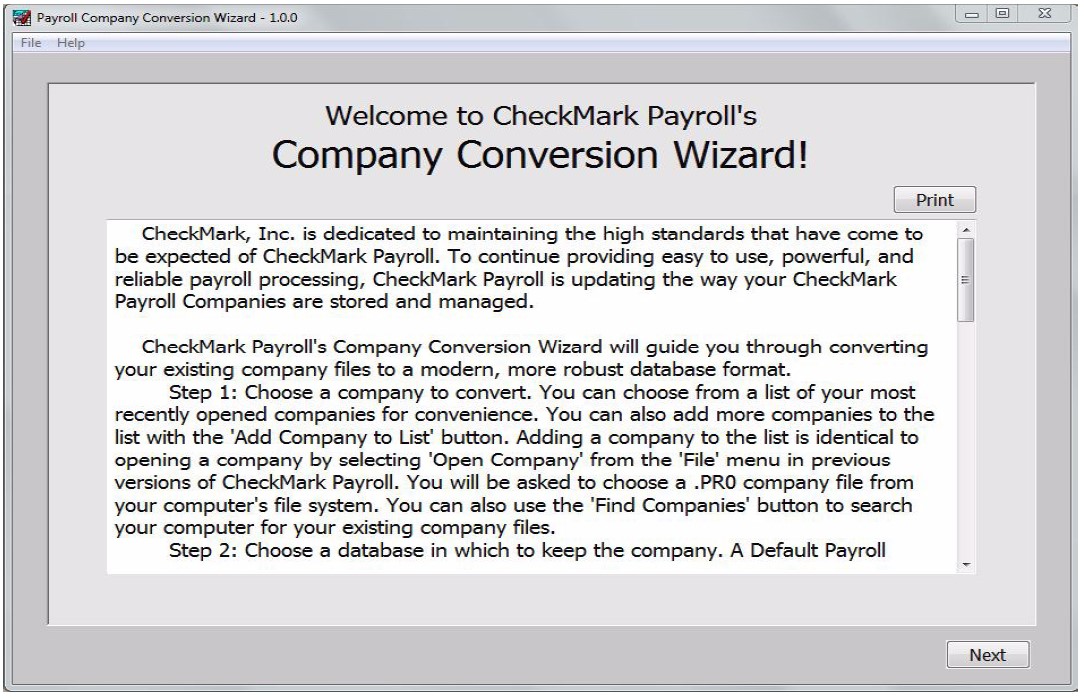
A Welcome screen appears with details on the conversion process and the new database that will be created. You can Print these details by choosing the Print button in the upper right-hand corner. Click Next to continue.
2. Choose the company you want to convert.
This screen lists the old company files that are ready to be converted. If your company is not listed you may either choose the Add Company to List or Find Companies button.
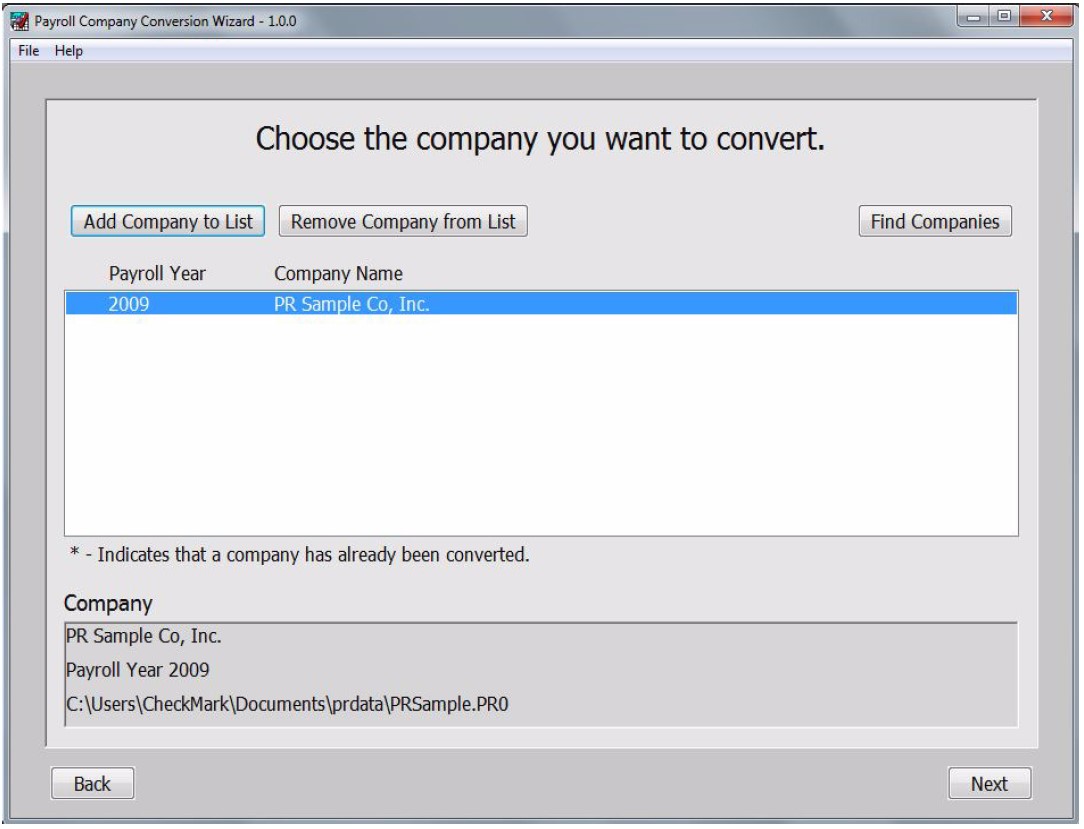
Choosing the Add Company to List button opens a dialog box for you to browse to and select the location where you saved the old payroll files.
The Find Companies button searches your hard drive and network drives for all available payroll files that can be converted.
Once the company list is populated, select the company you want to convert. You may only convert one company at a time. Click Next to continue.
Note: If there’s an asterisk (*) by the company’s name, this company has already been converted.
3. Choose a Database for Saving
Once you’ve chosen a payroll company to convert, you’ll have the option of saving the data into the provided Default Payroll Company Database or creating one of your own.
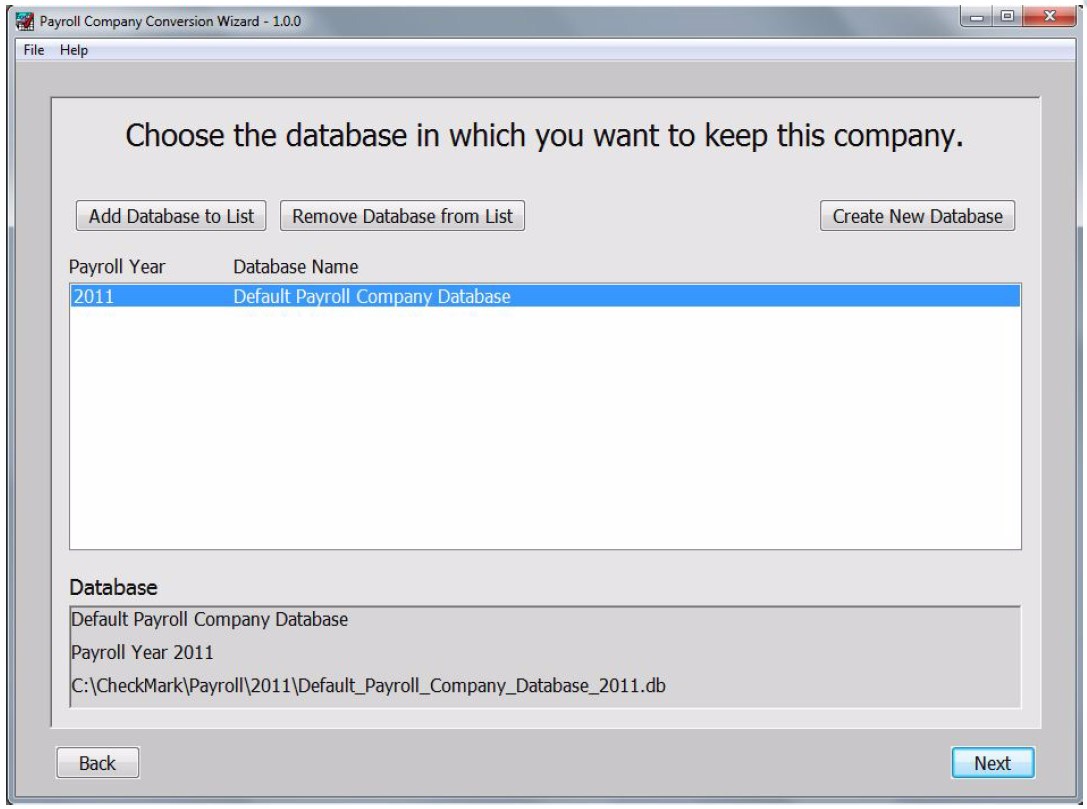
The location of the Default Payroll Company Database is:
Windows: C:\CheckMark\Payroll\2011\Default_Payroll_Company_Database_2001.db
Macintosh: HD/CheckMark/Payroll/2011/Default_Payroll_Company_Database_2011.db
Note: You can change the name of the Default_Payroll_Company_Database_2011.db after the convert is finished. For information on database management, See “Database Manager”.
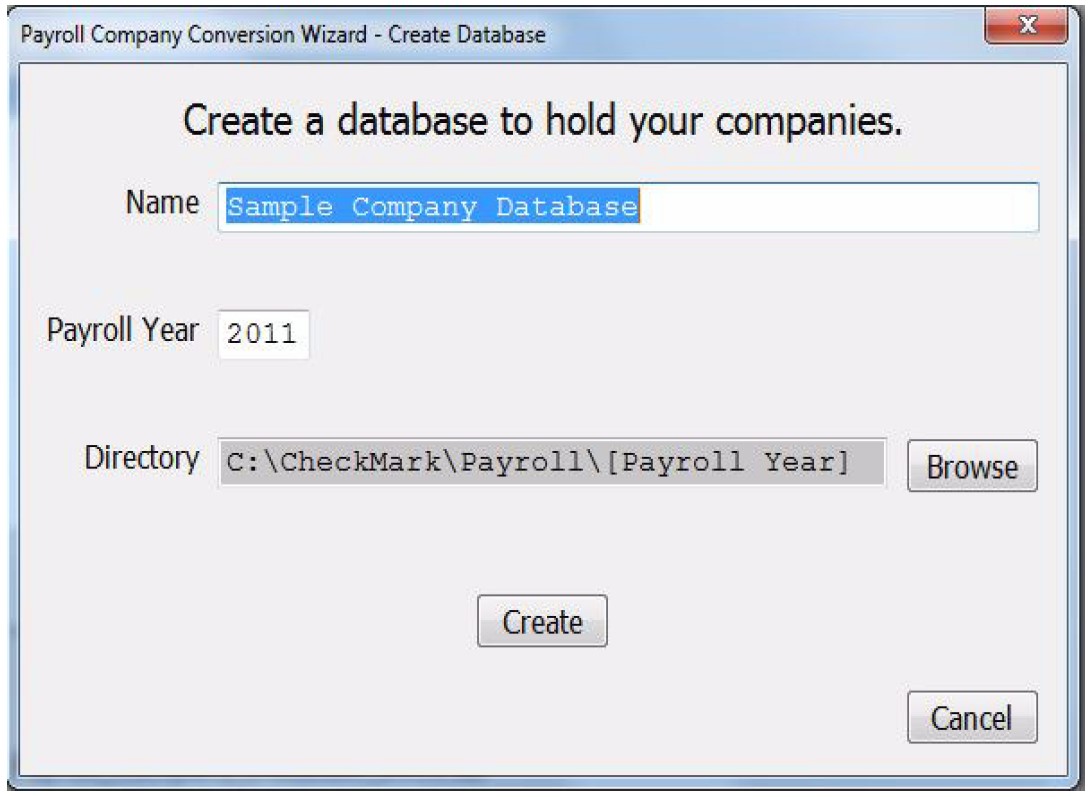
Create a New Database
1. To create your own database and/or save a database in a new location, choose the Create New Database button.
2. Enter a name for the new database.
3. Change the Year if necessary.
If necessary, change the default location where you want to save the database by choosing the Browse button.
4. Click Create to Save the new database. The new database should now be included in the list of databases to choose from for the final Confirm and Convert stage.
4. Confirm and Convert
After you have selected the database you want to convert your data into, click the Next button.
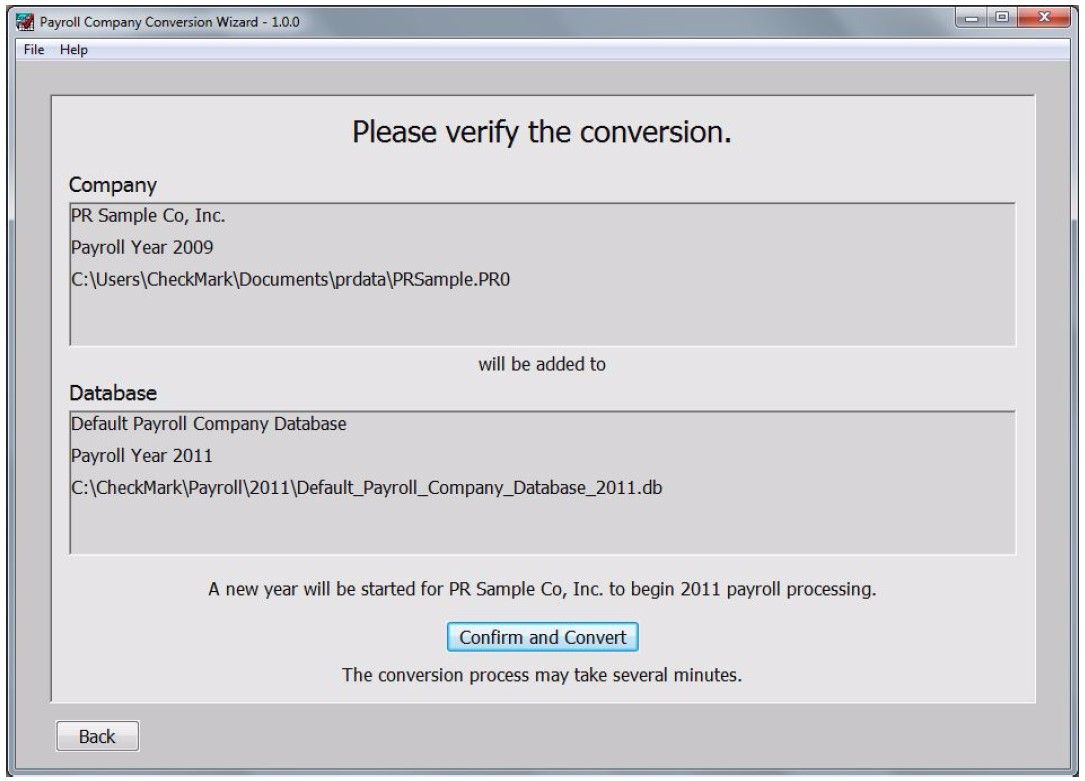
Verify that all information and save location is correct. If changes are needed, hit the Back button.
5. Click the Confirm and Convert button.
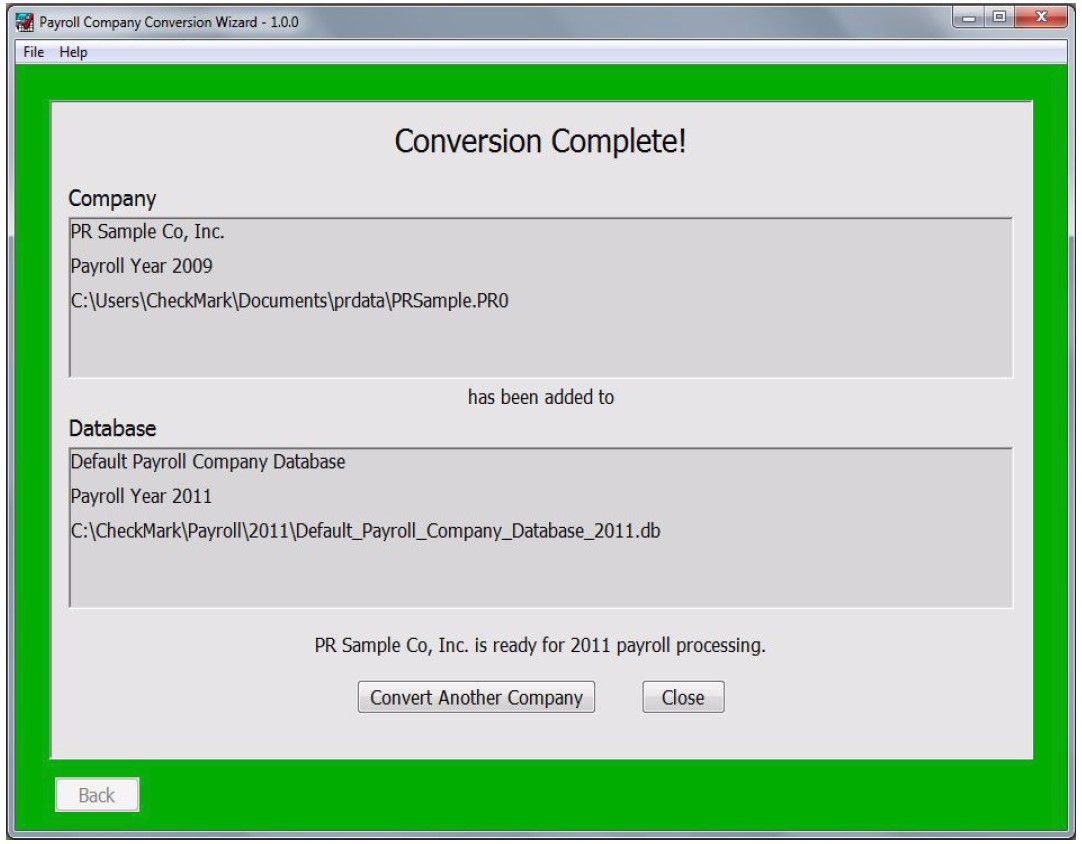
6. Once the conversion is complete and the green complete screen is displayed, you may either choose to Convert Another Company or Close.
You may now proceed to open the newly created files in the new database with Payroll version 8.2 or higher. For instruction on Opening your Payroll company, See “Open Company” in this article – How To Use Database Manager In CheckMark Payroll.
Related Articles
How to Get Started with CheckMark Payroll?
How to Install CheckMark Payroll
How to Use Command Center in CheckMark Payroll
How to Use Database Manager in CheckMark Payroll

