Setting Up Company Information
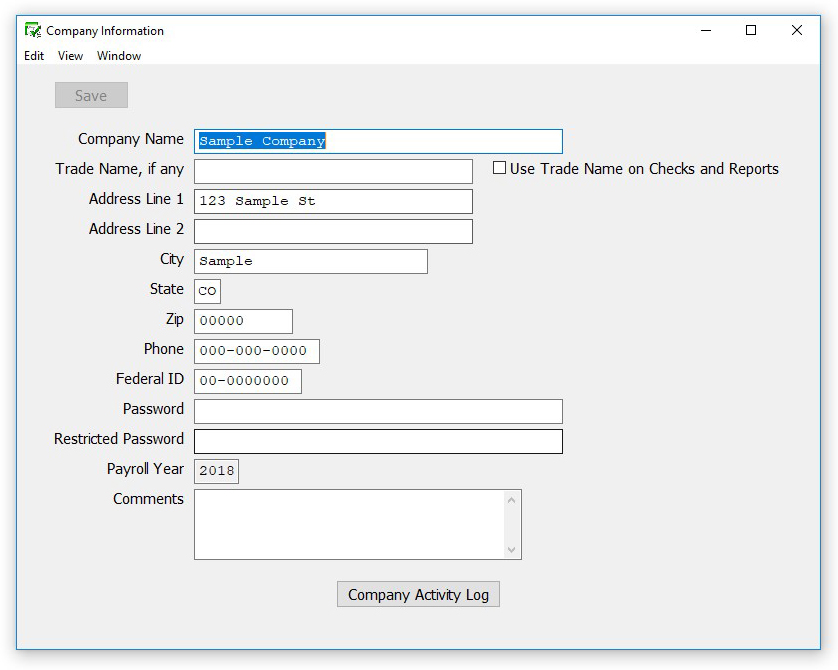
Use the Company Information window to setup your starting payroll year and to enter company information in CheckMark Payroll Software. (Basic company information, such as your company’s name, address, and federal employer identification number)
- Click Setup in the Command Center, then select Company Information.
2. Enter your company’s name and press TAB to move to the next field.
3. Complete all necessary fields and click Save.
Note: Press SHIFT-TAB (hold down the SHIFT key and press TAB) to move the cursor to the previous field and highlight any previously entered information.
Items in the Company Information Window
|
Company Name |
Enter your company’s legal name |
| Trade Name | Enter your company’s Trade Name, if any. |
| Use on Checks & Reports
|
Check this box if you want the Trade Name you entered to be used on checks and reports. If this box is not checked, CheckMark Payroll will use your Company Name on checks and reports. |
| Address Lines 1 & 2, City, State, Zip | Enter your company’s street address, city, your state’s two-letter postal abbreviation, and zip code.
Note: Only Address 1 information prints on Forms 940, 941, 944, and W-2/ W-3s; the information in Address 2 will not print on these reports. |
| Phone | Enter your company’s telephone number, including area code. |
| Federal ID | Enter your federal employer identification number. This number prints on 940, 941, 944 and W-2/W-3s reports. |
| Password | Enter up to 40 characters for a password if you want to restrict access to your company’s files. The password is not case sensitive. For example, an upper case “T” is treated the same as a lower case “t.” For more details, see “Setting Up a Password.” |
| Payroll Year | The payroll year you enter appears on checks and reports and limits the check dates you can enter. CheckMark Payroll works with one year of data at a time. The current year is automatically entered based on the year the database is in.
To modify the year, you must create a new database to change it to an earlier year. However, you can advance it to the next year with the New Year command. For details, see “Starting a New Year.” |
| Comments | The Comments field allows you to type text to keep track of items like dates and addresses for filing or other pertinent information that might relate to your company. |
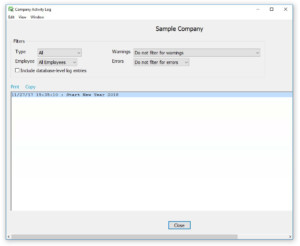
| Company Activity Log | Click the Company Activity Log button.
This screen displays a list of all activities performed in the payroll software. You can filter those activities by Type, Employee and Warnings. This helps give an idea of the daily, weekly, monthly, etc. transactions that are entered, modified or deleted. |


