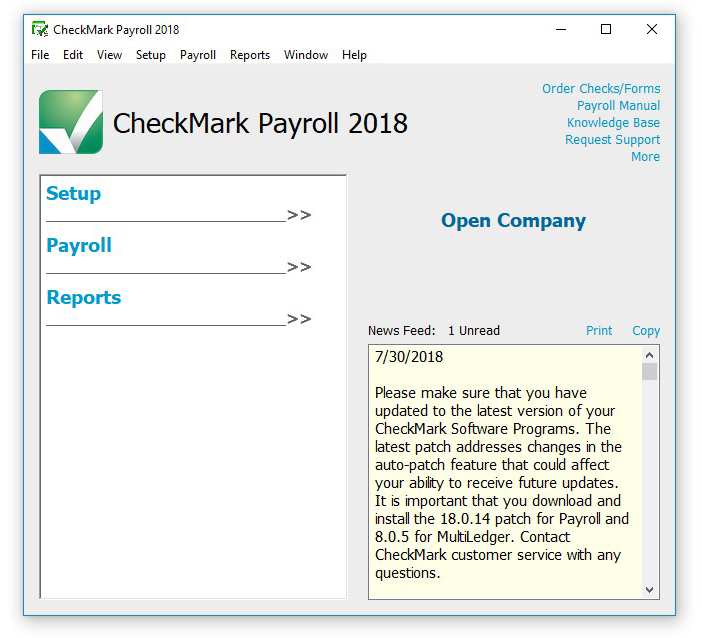
When you open up CheckMark Payroll Software, the command center appears on the screen.
The command center in CheckMark Payroll Software is divided into three sections: Setup, Payroll and Reports. To use the command center, first click the section you wish to open, then click the option you want. If no company is open, the options for each section will appear greyed out and inactive. When a company is open, the options for each section will appear bold and the payroll year, company name, as well as the type of filer the company is and the number of active employees will appear on the right of the command center. You can click the Show Database Path link and a dialog will appear that shows the path to the company’s database files.
The command center also has links to important support information, knowledge base articles, the user manual, as well as links to order checks and forms from CheckMark Online Store. The newsfeed at the bottom of the command center is a great way to keep up with the latest information from CheckMark.
Note: Not all menu commands are represented on the command center. Some dialogs, such as those under the File menu, can only be accessed using the pull-down menus or CTRL key (Windows) or COMMAND key (Macintosh) shortcuts from the keyboard.
Changing Command Center View
You can easily change the command center view back to CheckMark Payroll’s Classic command center by selecting Change View from the View menu.
Related Articles
How to Get Started with CheckMark Payroll?
How to Install CheckMark Payroll
How to Use Database Manager in CheckMark Payroll
Tips for Navigating Windows Within Payroll

