The setup of your company’s payroll is of utmost importance as it plays a critical role in ensuring ease of use and accuracy in calculating and reporting payroll. It is recommended that you carefully read through the following chapters and evaluate each item to determine which ones are essential for your company’s setup.
Depending on the specific needs of your company, some of the screens in CheckMark Online Payroll may not be necessary for use. Therefore, it is crucial to identify the required items and follow the setup chapters to ensure that all the necessary elements are available when setting up employees, employer payees, and ledger accounts.
Following the recommended setup procedure will not only ensure that your payroll system operates smoothly but also minimize the likelihood of errors in the calculation and reporting of payroll. Therefore, it is essential to prioritize this step to streamline the payroll process and avoid any potential issues that may arise in the future.
When setting up a new company in CheckMark Online Payroll, there are several important details that you need to enter to ensure accurate payroll calculations and reporting.
Setting up Company Information
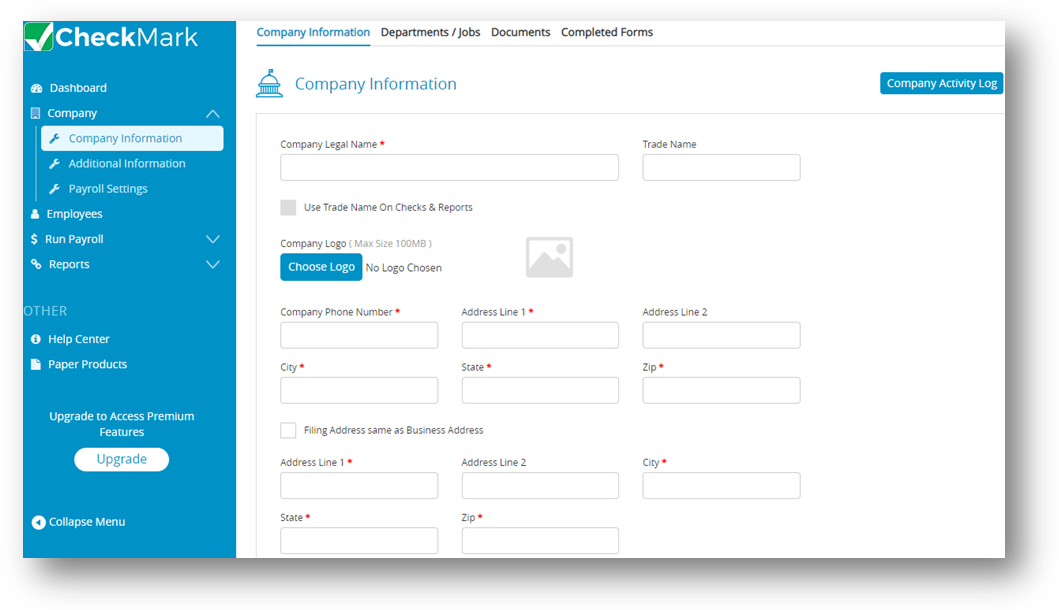
This section will provide information about how to enter the basic details for a new company. Use the Company Information screen to enter company details.
- Click Company option in the menu, then select Company Information.
- Please fill in all the fields to proceed.
Note: Select Choose Logo to upload your company logo, if required. - Click Save.
Once you’ve entered the basic Company Information and click the Save button, all the screens should now be active in the menu bar.
Items in the Company Information Window
| Fields | Description |
| Legal Name | Enter company’s legal name. |
| Trade Name | Enter company’s trade name, if any. |
| Use Trade Name On Checks & Reports | Check this box to use trade name on checks & reports else CheckMark Online Payroll will use your company name by default. |
| Company Phone Number | Enter company’s telephone number, including area code. |
| Address Lines 1 & 2, City, State, Zip | Enter your company’s street address, city, your state’s letter postal City, State code, Zip abbreviation, and zip code.Note: Only Address 1 information prints on Forms 940, 941, 944, and W-2/W-3s; the information in Address 2 will not print on these reports. |
| Federal ID | Enter federal employer identification number, which will be printed on 940, 941, 944 and W-2/W-3s reports. |
| Date of Incorporation | Enter company’s date of registration. |
| Payroll Year | The payroll year appears on checks, reports and limits the check dates you can enter. CheckMark Online Payroll works with one year of data at a time. |
| Comments | The comments field allows you to type text to keep track of items like dates and addresses for filling or other pertinent information that might relate to your company. |
| Company Activity Log | Click Company Activity Log to see all activities performed in the CheckMark Online Payroll. You can filter by type, employee and warnings in the payroll software. This helps give an idea of the daily, weekly, monthly, etc. transactions that are entered, modified or deleted. |

