
Exporting from MultiLedger
- Choose Export from the File menu.
- If necessary, make sure you have the month that contains the data you wish to export selected in the pull-down menu.
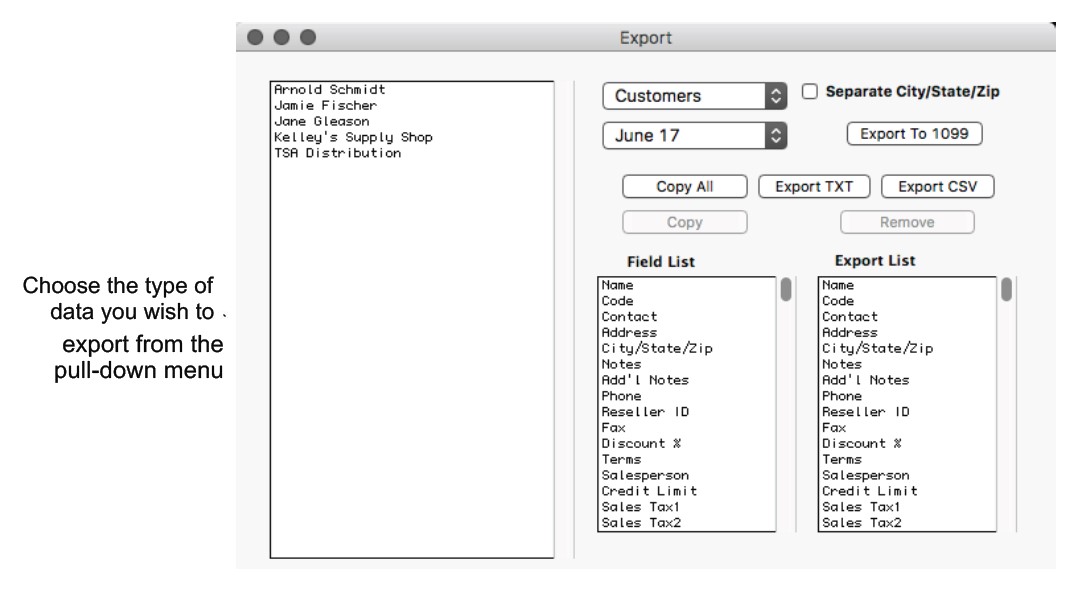
- Select the type of data that you want to export from the pull- down menu.
After selecting the appropriate option from the pull-down menu, a list of records for the month selected in the Month menu appears on the left and the Field List shows the fields that you can export. For example, if you clicked the Customers option, a list of customers appears:
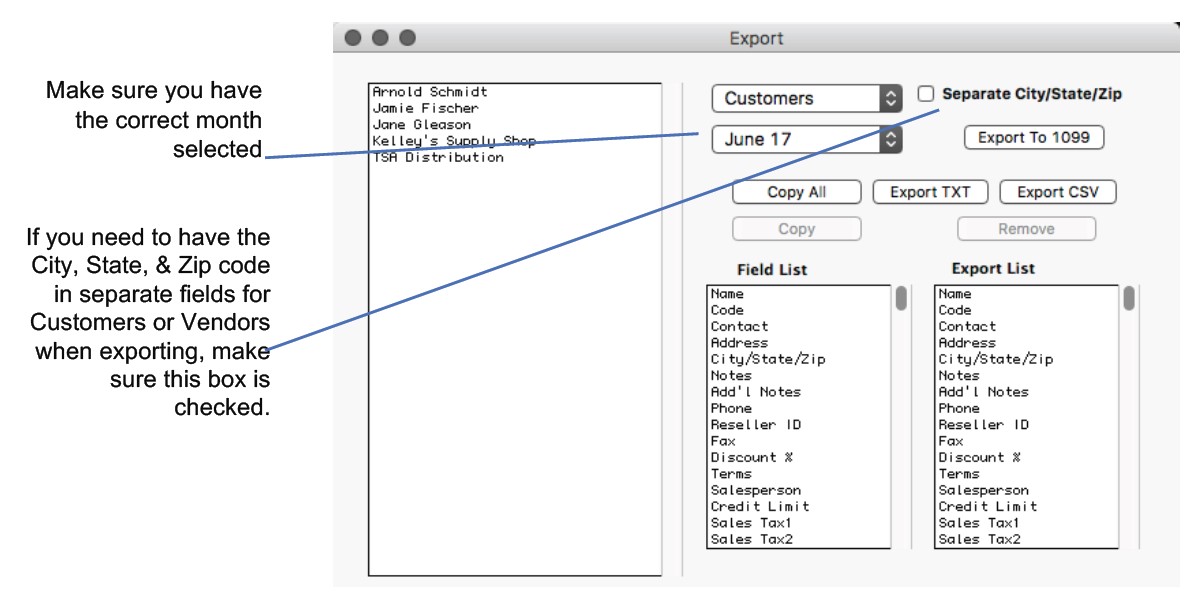
Note: If Customers or Vendors is selected and you want the City, State, and Zip Code exported in separate fields, make sure you select the Separate City/State/Zip checkbox.
- Click Copy All to copy all the fields from the Field List to the ExportList in the same order they appear in the Field List.
You can also select a field then click Copy, or you can double-click each field you want to export in the order you want it to appear in the text file.
Since there are no field names in a text file, you should carefully determine the order you want data to appear in the text file.
As you double-click each field in the Field List, the field name appears in the Export List:
To remove a field from the Export List, double-click it or click it once then click Remove. Fields below the removed field will automatically move up in the Export List.
- From the list on the left, select the records that you want to export. If no records are highlighted, all the listed records will be exported.
To select a consecutive series of records, drag on a range of records so that all desired selections are highlighted.
To select a non-consecutive series of records, hold down the Ctrl key (Windows) or the Command() key (Macintosh) while clicking each desired record. All desired records should be highlighted.
- Click Export.
A Save As dialog appears:
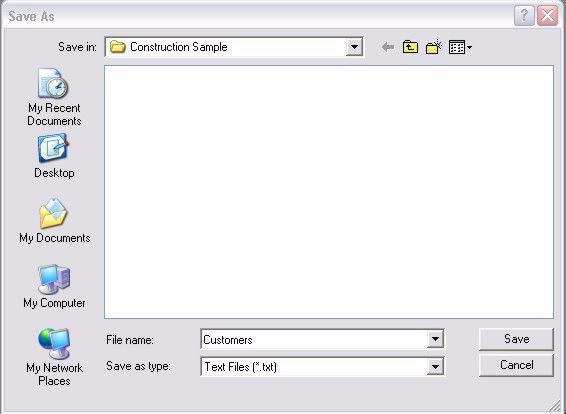
- A file name based on the category you have selected is automatically entered.
This can be changed if you want to rename the file.
- Determine where you want to save the file.
If necessary, use the folder pop-up menu to change folders or disks.
- Click Save.
You have created a new tab-delimited text file that can be imported into another program or another MultiLedger company.
Related Articles
How to Use General Ledger in CheckMark MultiLedger
How to Record, Modify & Delete General Ledger Transaction
Balancing Your Checkbook in CheckMark MultiLedger
How to Reconcile Your Bank Balances in CheckMark MultiLedger
Adjust Inventory Window in CheckMark MultiLedger
How to Use, Modify & Delete Adjust Inventory Window
Importing & Exporting in CheckMark MultiLedger
How to Export from CheckMark MultiLedger
How to Export to CheckMark Form 1099