
Customer Invoices
Use Customer Invoices when you want to create an invoice that records inventory sales, track sales commissions, enter tax rates, enter a shipping date, and so on. You can also record service sales (such as consulting) with Customer Invoices by setting up a service as a non-inventory Item (for details, see “Setting Up Items.”
Saving an invoice automatically updates the general ledger and creates an outstanding receivable. Use Customer Payments to record the amount a customer pays against the invoice.
Note: Before an inventory or non-inventory item can be sold in Customer Invoices, the item should have been set up on the Items window. For more details, see “Setting Up Items.“
Important: Do not use Customer Invoices to enter outstanding receivables dated prior to your Current fiscal year. Use the Sales Journal to enter these outstanding receivables when setting up your company with MultiLedger.
Customer Invoices Field Descriptions
This section discusses the individual fields on Customer Invoices.
Quote
When you save a Customer Invoice with Quote checked, the transaction does not affect the General Ledger, and can be modified, deleted, or converted to a Customer Invoice at any time. For more details on working with Quotes, see “Quotes.“
Recurring
If you have Customer Invoices that occur on a regular basis, you can save them with Recurring checked. You can define the frequency for a recurring entry and have MultiLedger remind you when the transaction should be created. For more details on working with recurring entries, see “Recurring Entries.“
Print on Save
If checked, the Print dialog box appears immediately after an invoice is saved.
Modify Item Description
If checked, when an item is selected, you get a text box in which you can change the description or add to it. This can be selected or de-selected for individual line items on the invoice. The modified item will appear as changed on the invoice, in the transaction journal, and in the General Ledger.
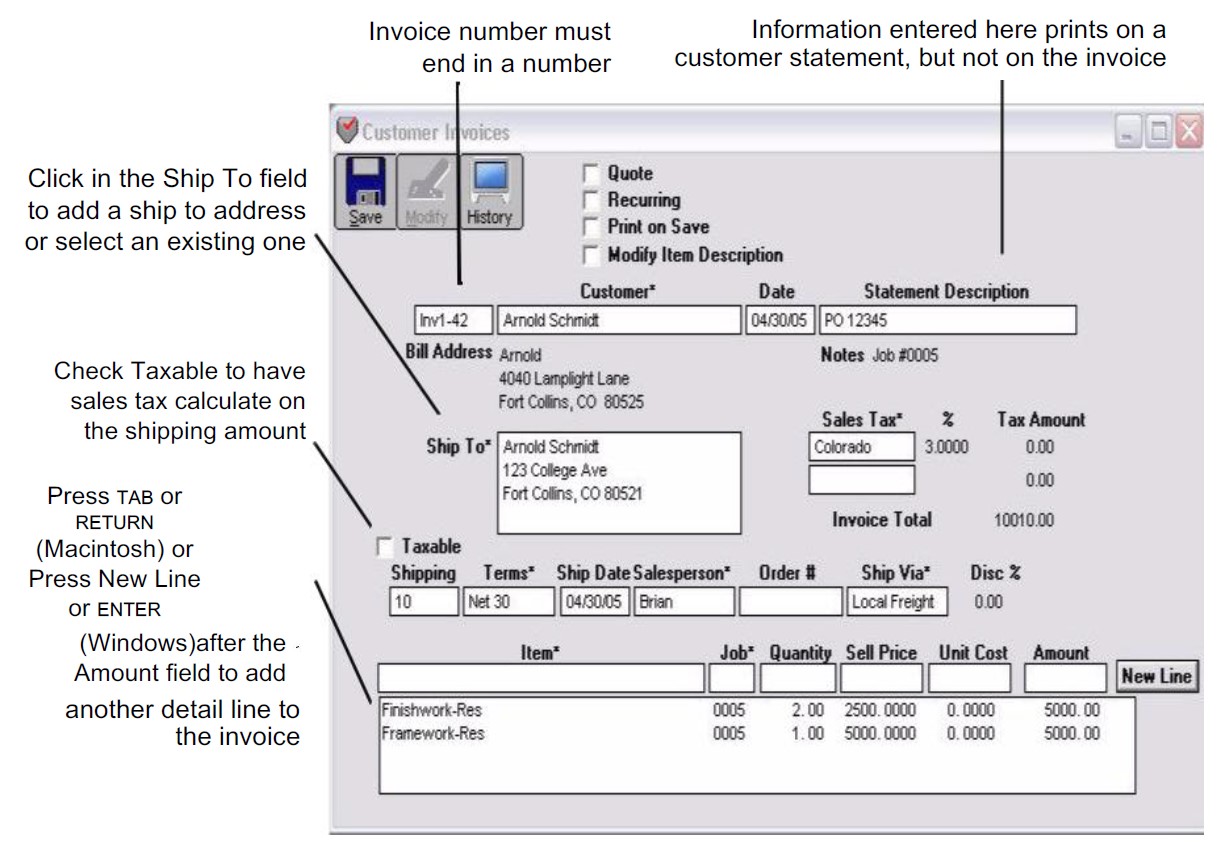
Invoice #
Enter an invoice number up to eight characters long to identify the invoice. The last character must be a number.
After the invoice is saved, the invoice number (or last number of a combination of characters) is automatically increased by one.
You can have MultiLedger automatically warn you if you attempt to save a transaction with a duplicate document number by checking Check for Duplicate Documents on Preferences under the File menu. For more details, see “Setting Program Preferences.“
Customer
Select a customer from the pop-up list. The customer’s address, Discount Percentage, and Notes set up for the customer are entered automatically too. Notes appear during transaction entry, but do not print on the invoice. If the pop-up list does not appear, customers have not yet been set up.
You can add a new customer or edit existing customer information without closing the Customers pop-up list by clicking New (Alt-N on Windows or N on Macintosh) or Edit (Alt-E on Windows or E on Macintosh).
Any Discount % set up for a customer will reduce the Selling Price for each item sold by the percentage shown.
Ship To
Once a customer name is entered, you can select an existing or add a new shipping address to this invoice by clicking anywhere in the Ship To box. The following edit box appears:
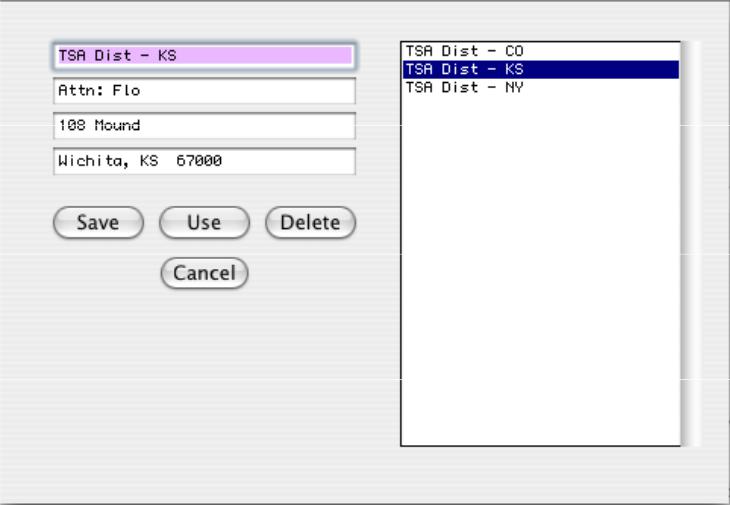
Enter a Ship To address, then click Save. Ship to addresses appear in the order in which they are entered. To use a Ship To address on this invoice, select the address in the list, then click Use.
After you click Use, the information is entered into the invoice, and the cursor moves to the Date field. To not enter a Ship To address, click in the Ship To box, then click Cancel. To remove a Ship To address from an invoice, click in the Ship To box, then click Cancel.
Important: You can modify existing addresses if necessary, but it’s best not to Delete Ship To addresses.
Date
Simply type over the highlighted day or use the +/- keys on your keyboard to increment/decrement the date. You can enter a date from the 30 open months, provided the month isn’t locked, in the form MM/ DD/YY.
The invoice date, along with any selected terms, determine the invoice’s due and discount dates.
Statement Description
Enter a description up to 25 characters long. You could enter a purchase order number or some other reference number. The description will print on a customer statement but not on the invoice. If you don’t enter a description, the customer name will be automatically copied to this field when you save the invoice.
Sales Tax
Select a Sales Tax category from the pop-up list. If the pop-up list does not appear, sales tax categories have not yet been set up.
You can have up to two sales tax categories per invoice. The first sales tax field could be used for a state tax and the second sales tax field could be used for a city tax. If no tax should be applied, click Cancel in the pop-up list. These tax rates only apply to items that have been set up with Taxable Rates 1 and 2 checked and to shipping if the checkbox is selected.
You can set up default sales tax categories for your customers that will be selected automatically when you reach the Sales Tax pop-up list. The second Sales Tax field is skipped automatically unless you uncheck the “Skip Tax 2 During Invoice Entry” option on Preferences under the File menu.
If “Include Tax 1 in Tax 2 Computation” is checked on Preferences, the calculated tax value in the second Sales Tax field includes the amount in Tax 1, as well the amount of all items on the invoice.
Taxable
If checked, the shipping amount will be included in the sales tax calculation.
Ship Chg
If shipping is charged to a customer, enter a dollar amount.
To account for a shipping charge in your chart of accounts, set up the account using Chart of Accounts, and then assign it to the Shipping Charged on Interface Accounts.
Terms
Select the terms from the pop-up list. If the pop-up list does not appear, terms have not yet been set up.
You can choose default terms for your customers on Customer Setup that will be selected automatically when you select the customer from the pop-up list.
Terms determine the discount date and when payment is due for the invoice. If terms are not entered, the invoice’s date becomes the due date.
Ship Date
The Ship Date is filled in automatically with the invoice date. If necessary, enter a new date.
Salesperson
Select the salesperson from the pop-up list. If the pop-up list does not appear, salespeople have not yet been set up.
You can choose a default salesperson for a customer on Customer Setup that will be selected automatically when you reach the Salesperson pop-up list.
Sales of commissionable items appear on Salespeople reports.
Order #
Enter a purchase order number up to 13 characters long.
Ship Via
Select the Ship Via method from the pop-up list. If the pop-up list does not appear, shipping methods have not yet been set up.
You can either enter a name from this pop-up list or click Cancel in the pop-up list box and type a 13 character name that’s not in the Ship Via list. If you type the Ship Via method in, MultiLedger won’t save the Ship Via method for future use.
Item
Select the item from the pop-up list. If the pop-up list does not appear, items have not yet been set up.
You can add a new item or edit information for an existing item without closing the Items pop-up list by clicking New (Alt-N on Windows or N on Macintosh) or Edit (Alt-E on Windows or E on Macintosh).
Note: By selecting the option to Modify Item Description, you can change or enter additional text in the item description line. This text will show on an invoice and in the transaction joural reports.
Important: If the item you select does not have a sales account (in the 4000 range) assigned to it when you save the invoice, MultiLedger warns you that the sale will be incorrectly posted to the first account in your chart of accounts (usually the cash account). You should assign the correct sales account to the item on Item Setup, then you should modify the invoice and resave it in order for it to post to the correct account.
Job
Select a job from the pop-up list. If the Jobs pop-up list does not appear, no jobs have been set up, or Skip Jobs (Ctrl-K on Windows or K on Macintosh) under the Edit menu is checked.
Quantity
Enter a quantity that is up to seven digits to the left of the decimal point and three digits to the right (9999999.999).
MultiLedger warns you if you attempt to sell more of an item than you have on hand. If you enter a quantity that is greater than what you have on hand for the item, the following alert appears:
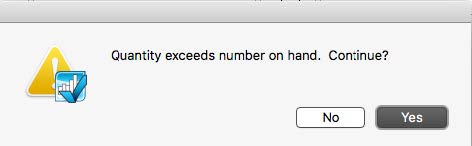
Click Yes to accept the quantity entered or click No to return to the invoice so that you can change the amount.
Selling Price
When the cursor enters the Selling Price field, the selected item’s Selling Price, as defined on Item Setup, is entered and highlighted automatically. You can have up to three different selling prices per item. You can also assign a default pricing level to your customers. That way, the correct pricing level is entered automatically for the selected customer. If the customer on this invoice does not have a default pricing level assigned, Selling Price 1 is used.
You can change the Selling Price for a particular invoice by editing the highlighted amount. If you want to permanently change the Selling Price associated with a particular item, you should change the Selling Price on Item Setup.
Unit Cost
When the cursor enters the Unit Cost field, the selected inventory item’s Average Unit Cost, as defined on Item Setup, is entered and highlighted automatically. You can enter a unit cost up to six places to the left and four places to the right of the decimal point (999999.9999).
The Unit Cost shown here is used to cost the inventory item when the invoice is saved. The cost of the item is a calculation based on Quantity times Unit Cost. When you save the invoice, the Cost Account assigned on Item Setup is increased (debited) and the Inventory account is decreased (credited).
If you change the Unit Cost on Customer Invoices, the Average Unit Cost for the inventory item is automatically adjusted for future invoices.
If the item’s quantity on hand is greater than zero, then the Avg Unit Cost is used as the Unit Cost to cost the item.
If the item’s quantity on hand is less than or equal to zero, then the Last Unit Cost is used as the Unit Cost to cost the item.
Note: Please Note: that you can hide the Unit Cost field on customer invoices by checking Hide Unit Cost in Customer Invoice on Preferences under the File menu. For more details on this option, please see “Setting Program Preferences.“
Amount
When the cursor enters the Amount field, the amount will be calculated automatically based on Quantity times Selling Price.
New Line (Windows Only)
To enter another detail line to the invoice, click New Line or press ENTER.
Invoice Total
This shows the total for the invoice as you add items to the invoice. When you save the invoice, the Invoice Total amount increases the Accounts Receivable account assigned on Interface Accounts.
Recording a Sale with Customer Invoices
- Click Customer Invoices in the Command Center.
- If necessary, enter or change the invoice number, press TAB.
The Customers pop-up list appears:
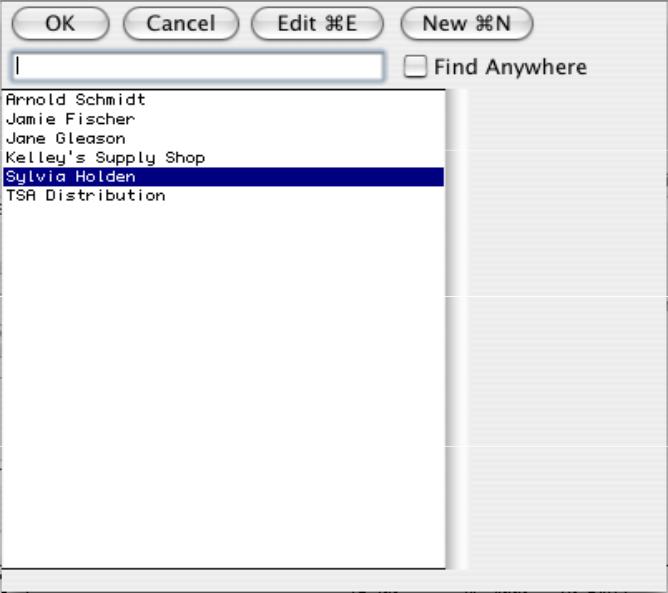
- Select a customer from the pop-up list, and press TAB.
For details about using pop-up lists, see “Using Pop-Up Lists.“
Note: After selecting a customer, you can see the customer’s transaction history by clicking on the History button at the top of the window. The current date is used as the Cut-off Date for the report.
Click the window’s close box to close it and return to Customer Invoices.
- Continue filling in the rest of the fields with the appropriate information.
For field explanations, see “Customer Invoices Field Descriptions.“
Note: You can add comment lines to the invoice at any time by choosing Insert Line from the Edit menu (Ctrl-I on Windows or I on Macintosh). You can also add additional description to the Item description line. For more details, see “Adding Comment Lines to Transactions.“
- After you have entered an item, quantity, selling price, and amount, press TAB to add the item to the invoice.
As you add items to the invoice, the Invoice Total field is updated:

![]()
After the first item is added, the Save button is enabled.
![]()
Important: If the item you select does not have a sales account (in the 4000 range) assigned to it when you save the invoice, MultiLedger warns you that the sale will be incorrectly posted to the first account in your chart of accounts (usually the cash account). You should assign the correct sales account to the item on Item Setup, then you should modify the invoice and resave it in order for it to post to the correct account.
- On Windows, if necessary, click New Line or press ENTER to begin entering another item.
On Macintosh, if necessary, press TAB or RETURN again to begin entering another item.
- When you are finished entering all the information for the document, click Save.
If the Invoice Total exceeds the customer’s credit limit, an alert appears allowing you to continue to save or cancel.
After the invoice is saved, the transaction is automatically posted to the general ledger, and the invoice number is increased by one.
Printing a Customer Invoice
MultiLedger offers you two ways to print an invoice:
- Check “Print on Save” on the Customer Invoice window. When you save an invoice, a standard Print dialog box appears. Select your print options and click OK or Print.
or
- Use the Print on the Command Center. After saving a Customer Invoice, do the following:
- Click Print from the Command Center.
- Select the correct month.
- Click the Customer Invoices & Quotes radio button.
- From the list of documents, select the invoices that you want to print.
If no invoices are highlighted, all invoices and quotes for the selected month will be printed.
- If necessary, check Print Metafile (Windows) or Print PDF/PICT File (Macintosh).
For more information on using Metafiles or PDF/PICT Files, see “Using the Print Screen.”
- Click Print.
- Select your print options and click OK or Print.
For more details about the Print command, see “Using the Print Screen.“
Note: MultiLedger’s flexibility allows you to adjust where the Customer Invoice fields print on an invoice form. For more information, see “Customizing Print Field Positions for Your Printer.”
Note: MultiLedger also prints packing slips based on Customer Invoices. Packing slips contain most customer invoice information except dollar amounts. For more information on printing packing slips, see “Using the Print Screen.“
Modifying or Deleting an Invoice

When the cursor is in the Invoice # field, the Modify button is enabled. Click Modify to see a list of Customer Invoices that you can modify or delete. If the Customer Invoice you’re looking for doesn’t appear, you may have to select another month from the pull-down menu.
Related Articles
Customer Transaction Flowchart
How to Record Sales in MultiLedger
How to Use Sales Journal in MultiLedger
How to Use Receipts Journal in MultiLedger
How to Use Customer Payments in MultiLedger
How to Create Quotes in MultiLedger